This past year... I have had so much fun creating for GCD Studios! The monthly inspiration was wonderful! The theme assignments were always my favorite. Maybe because those always seemed to be easier to me. The technique assignment always pushed me out of my comfort zone a bit, but I learned in the end I needed that! It's not always easy to come up with a "new" technique, but it's also fun to put a twist on something used before! GCD pushed me to do that! And I loved it!
Thank you! I'm honored and looking forward to being with GCD for another year.
------------------------------------
Here in the midwest, the days are getting longer and the temperatures are slowly beginning to raise. The more green the grass becomes, the more excited I get about the blooming flowers that will soon follow.
There's one particular flower that I always look forward to. It's my little rose bush that resides right next to our front door. My sisters and I each received this special bush after our grandfather passed away in 2007. I shot the photo a few years back and it remains one of my faves to this day.
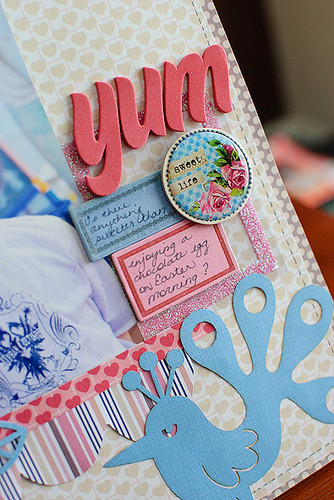
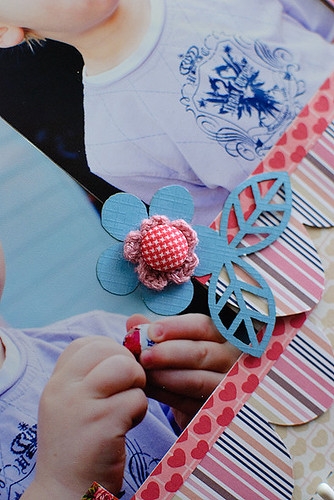
I was so excited when I opened up my box of GCD Studios goodies. The little {cabochons} and the {crepe paper garland} from the Fun House collection were perfect for my rose bush page!
Papers used:
{she seeks}
{lovely garden}
{come one, come all} floral side
Do you have a special flower or plant in your garden? Don't forget to record your story today!
4.28.2011
4.25.2011
Cards with Teri
Hi all!
Teri here, and I'm wanted to have some fun today and play with GCD's Funhouse collection.
This is such a great collection of paper and embellishments, which I think is perfect for birthday layouts and cards.
But it's also an awesome collection to whip out cards for people you want to congratulate on a job well done.
I've got two cards today that I did just that with.
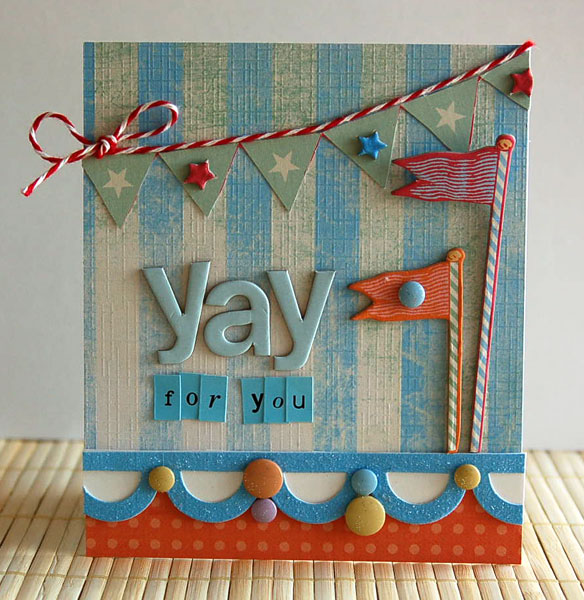
I started with this card here.
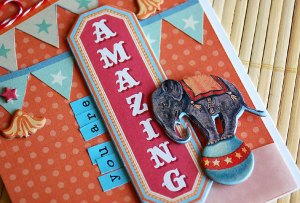
I cut out the banner from a piece of paper from the Funhouse house collection.
Then, I decorated it up with some stars from the Chipboard Shapes from Funhouse collection. I also topped it of with a little Baker's twine. I think Baker's twine just a fun little kick to any project.
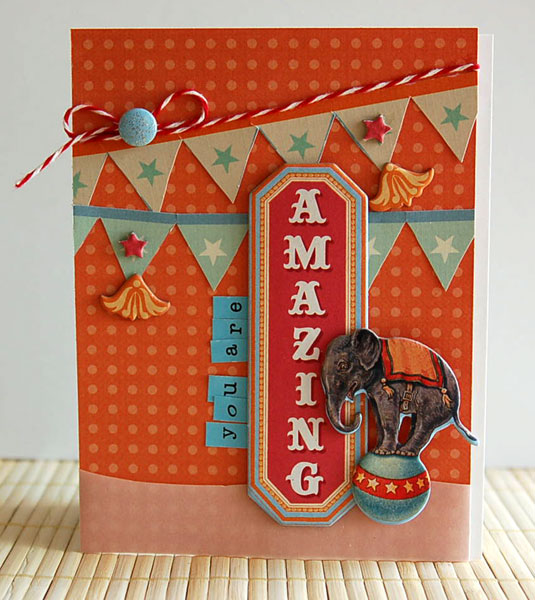
I made this second card by following a somewhat similar design scheme.
Again, I cut banners from patterned paper. I again gave them a little kick by adding twine and chipboard embellishments to them.
This time, I used a chipboard elephant rather than flags. And I laid the sentiment right next to it.
terisplace.wordpress.com
4.20.2011
Perfect for Easter- with Juliana
Hi all! Juliana here! With this final post, I say good bye to GCD Studios after an amazing year of working with some super talent and some fabulous products! Heidi always had a challenge for us, but it helped me step outside my comfort box and try something new. I really want to thank both Heidi and GCD Studios for the opportunity of being one of your designers this past year!
Spring is finally here and I am so excited to see the green stuff popping out here and there! I prefer the warmer weather and I am quite pleased that I can now see that it really is on it's way! For our final GCD Studios project we were asked to create something spring or Easter themed so I went for the Easter theme. I was at my local craft store and saw these foam eggs and this wooden basket, the ideas started flying and here is the end result...a little mini Easter egg basket embellished with Chip Art Chipboard and patterned paper eggs and hand made paper flowers.
Melody Ross's new collection Soul Food is fast becoming a favorite of mine! I love the combination of orange, pink, green and brown and the fun text and floral designs. The wooden basket is covered with patterned paper as well.
As I mentioned, I used GCD Studios Chip Art products to decorate the front of my basket. I used the Squiggle stamp set to create the border around the tag piece. I distressed the Happy Easter plaque by painting the chipboard tag with white acrylic paint. Once it was dry, I applied a layer of antiquing gel and wiped off the excess, which leaves some of it behind, giving it a nice distressed feel. And don't you think the yellow glitter gives a bit of life to that cute little chick?!
I created some hand made flowers using die cut flowers and leaves to decorate the eggs.
Supplies:
GCD Studios
Soul Food Soulfield, Lovely Green, Soulful, Funky Soul, Soul Petit, and Brave Soul
Chip Art Chipboard Shapes: Birds and Tags
Chip Art Tools: Mallet, Block
Chip Art Ornamental Stamps: Squiggle
Now that you have seen my little basket, I thought you might want to know how I created the eggs. So I put together a little tutorial for you to follow so that you can create your own patterned paper eggs using your favorite GCD Studios papers.
Supplies:
Patterned Paper
4" Styrofoam Eggs
Hot Glue Gun
Modge Podge
How to make Patterned Paper Eggs:
Cut an 8" x 12" piece of patterned paper into strips of paper that are 1/2" in width.
Then adhere the strips to the egg in an overlapping pattern running the entire length of the egg.
I used a hot glue gun to get this started. Once I had added about 4 strips I began applying some Modge Podge to the sections were the papers were touching/overlapping each other. I found this to be helpful in keeping the paper more flat as you continue adding the layers. This does tend to make things a little messy, so consider yourself warned!
Here you can see that this egg is almost finished. Remember you want to continue to add the paper strips until all of the "white" areas are completely covered. Once you have the entire egg covered with paper, apply a coat of Modge Podge and let this dry. Once dry, apply a coat of Glitter Paint to give the egg a bit of shimmer.
Then feel free to embellish your egg with flowers, buttons, gems, etc.Thank you so much for stopping by today and I hope you have fun creating your own Easter Egg decorations!
HAPPY HUGS!
Juliana
4.19.2011
Getting crafty with Kim
Hi Kim here with my final blog post as a member of the GCD team.
This past year has gone so quickly - I know that the new team is going to love their 12 months as much as I did! Thank you GCD Studios and Heidi for the opportunity to work with you.
So Heidi asked as to do something with a Spring feel for this project ... and I thought Easter (even though Easter is in Autumn downunder!). This was the project that I came up with using a mix of Material Girls, Animal Crackers for boys and Animal Crackers for girls. How cute are those birds that I cut from the die cut paper in Animal Crackers for boys?
And here are some shots of the details ...Cheers
Kim xxxx
4.15.2011
Yummy layouts with Jill
Jill here and I am so excited to be able to share the layouts I created for GCD
Studios for the Winter CHA show. I was able to work with three of the new
collections: Material Girl, Animal Crackers - Girls and Fun House.
First, here is my layout using Material Girl and my "Little Diva" Lily posing
with sunglasses. I love the juicy colors in this collection and the lacquered
smooch was the perfect touch!
with sunglasses. I love the juicy colors in this collection and the lacquered
smooch was the perfect touch!
as well as used the Chip Art tool.
And here is my layout using the Animal Crackers - Girls collection. I LOVE,
LOVE, LOVE the colors in this one (brown, white, navy, pink and orange) and the
designs are perfect for baby girls. Those little circles were just punched out
of one of the patterned papers and I adhered several of them with foam adhesive
for extra dimension.
designs are perfect for baby girls. Those little circles were just punched out
of one of the patterned papers and I adhered several of them with foam adhesive
for extra dimension.
alphabet, and I love the extra texture that it brings to the layout.
paper. I cut out several of the flowers for this layout and accented them with
Stickles glitter glue.
And, finally with what I'm sure will be a favorite collection for me to use is
the layout I created with Fun House, "The Merry-go-round." I just love the
vintage feel of this collection.
the layout I created with Fun House, "The Merry-go-round." I just love the
vintage feel of this collection.
one of the GCD Studios chipboard frames.
Thanks for looking today! I'm so excited for the new product to hit the shelves!
:)
Jill
4.14.2011
Hello! I'm Susan Lui from Singapore ....
and I'm thrilled to be guest designing for GCD Studios.
I started scrapping a couple of years ago and fell in love with this hobby because it allowed me to record and preserve memories for my family in a manner that appealed to the creative side of me. The combination of beautiful papers and media, capturing memories and creating art was just the creative outlet I was looking for. I have a fondness for shabby-chic designs and love layering my layouts and sprinkling them with little details. I also enjoy exploring different techniques on my projects and getting my fingers all messy from mists, inks and paints. I love my projects to have lots of texture and often times my layouts end up very three-dimensional because of the mediums and embellishments I use. That creates a bit of a problem for storing my layouts in albums, but hey! It's a happy problem. :)
Here are some projects I created using the new CHA releases from GCD Studios.
First up, Puppy Love, a layout I created using the Antiquities collection.
I love the vintage look of this collection and the color palette of rich reds with weathered browns. I layered the layout using a combination of fabrics, such as burlap and muslin to create lots of texture and dimension.
I then layered on some flowers, leaves, crinkled seam binding and lace to complete the shabby-chic layout.
Next, I created a layout using the Spring in Bloom collection.
As you can tell, I love butterflies on my layouts and here I created my own background paper using glimmer screens and glimmer mists from My Tattered Angels. I then cut out the butterfly motifs from the Spring In Bloom papers, folded them up for dimension and had them flitting around on the layout.
Another butterfly on the layout here, to complement the lovely butterflies from the patterned paper. This time a crystal butterfly resting on a silk flower, both from Zva Creative.
Finally, a layout that's a little different from my usual colour scheme. I used papers from Fun House Collection to create this fun layout featuring our little puppy.
I created a couple of banners strung on twine for the title.
A heart-shaped border for the circle mat, punched out from border punches, inked and distressed.
Thanks for the opportunity to guest, GCD! I had a blast and will be creating more with all the goodies you sent me. Check out my blog as I continue to post more of my GCD projects as and when I complete them.
Hugs,
Sue