Teri here, and I'm happy be back with another fun technique to share with everyone here on the GCD Studios blog.
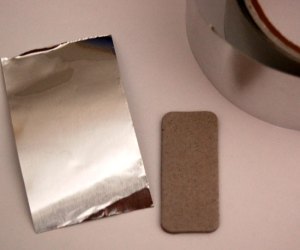
This time I am going to show you a cool way to make metal tiles with chipboard, aluminum tape and the Chipart tool.
You are going to need:
* The Chipart tool and accessories
* Chipboard
* Aluminum tape
And here's what to do:
1. Start with a Chipart Chipboard tile and metal tape. The tape I am using here is aluminum tape from the hardware store. You can get it in the electrical department.

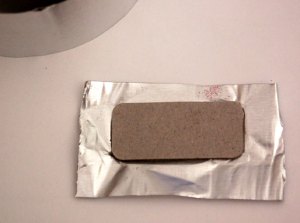
2. Place Chipart tile on the tape. Wrap tape the tape around it. If you are having a hard time getting the tape to wrap around the tile, use a bone folder to smooth it down.

3. Use Chipart tools to hammer a design onto the tile. You'll note that unlike when you normally use chipboard, you don't have to get the tile wet. Because the tape is relatively soft it will take easily to the Chipart tool.


You can use it now or you can add a few finishing touches to it.
You color it with alcohol based markers or inkers. You can even paint and sand it.
I used this metal Chipart-style metal tile technique to make two projects.
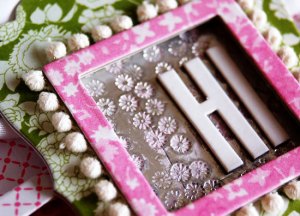
First, I made this card. I created the metal looking tile inside the frame here.

I simply impressed a flower Chipart design over and over on the tile. To give it a more shabby look, I brushed paint over it. I left the paint dry and then rubbed it with a sanding blog. That left the paint in the flower designs.

Then, I made this Hello card.

I went real simple here and just used the Sparrow alphabet to stamp the sentiment.
I brushed pink paint over the finished tile. I let it set for just about a minute and then used a baby wipe to brush off the excess paint. I love that the paint took to the letters.

What I love most about tile is it looks a fancy embellishment, but it only costs pennies and a few minutes of crafting time to make it.
That is all for now. I'll be back again soon!
Teri
for GCD Studios

So cool Teri! Definitely gonna give this a go!
ReplyDeleteVery inspiring! Super cute cards!
ReplyDeleteThis is so awesome! I can't wait to get my hands on these tools! Thank you for posting all of these ideas. :)
ReplyDeleteSuper cute idea!
ReplyDeleteI love this!!!!
ReplyDelete