3.20.2013

Wish you were here

Tracy Schultz Wish you Were Here GCD
 I couldn't help but smile when I saw the Sun Kissed Collection. The patterns and colors are so bright and fun. And my favourite part- they all coordinate effortlessly together. Which really is the key to a great collection. Tracy Schultz Wish you Were Here close-up GCD Here, I wanted to focus on that great floral paper. But I added some snippets from a few other patterns you'll see in there (the alphabet and the sentiment). A little faux-stitching and some scallops were all I needed to finish this card off. [Supplies: GCD Studios Sun Kissed collection; Stamps- My Cute Stamps Celebrate Today; Ink- Memento Tuxedo Black; Copics: R11, R14; Accessories- Fiskars cloud decorative edge scissors, Jillibean Soup green twine, KaiserCraft clear gem, paper piercer, Copic Multiliner .3 gray] Tracy Schultz Hello Travel GCD I kept my second card a little simpler and focused on some of the blue patterns. And really- how can you resist this cute little car?!?! I know I couldn't. Tracy Schultz Hello Travel close-up GCD I added a tiny yellow button with some twine threaded through it to make everything pop. Fun, right? [Supplies: GCD Studios Sun Kissed collection; Accessories- corner rounder punch, yellow button, Jillibean Soup orange twine, square punch, Sticky Thumb dimensionals]
3.19.2013

Lovely Shade of Pink

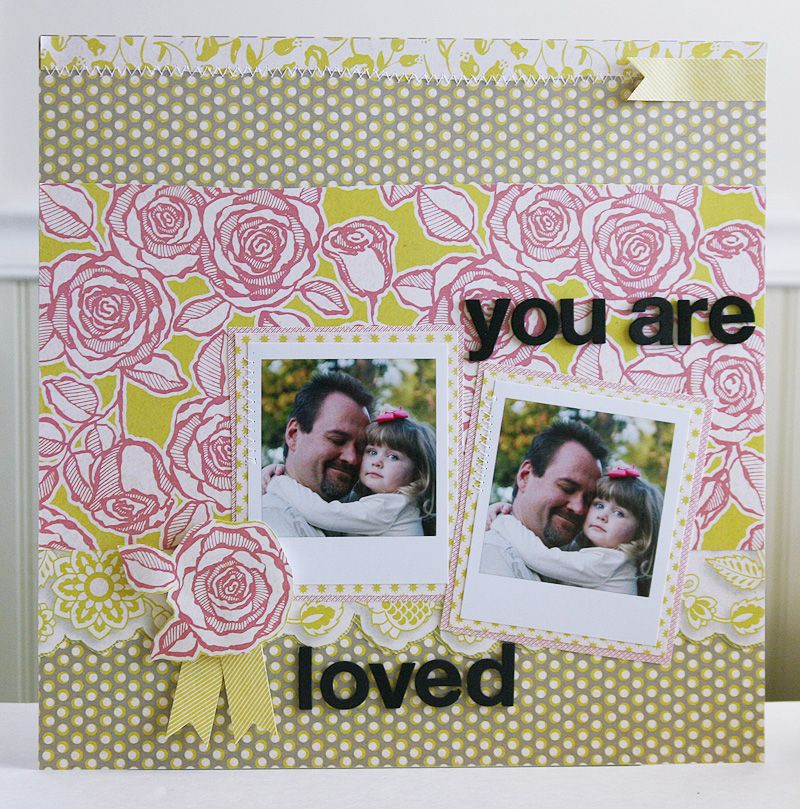
Have you seen the beautiful new Charleston collection?? Grey and yellow is such a hot combination right now. Add in a lovely shade of pink and you have Charleston!  I love the mix of  patterns, especially the big cabbage roses!

For my layout I did some fussy cutting, layering and even a little machine stitching too!

Thanks for stopping by the GCD Studios blog today!

3.18.2013

I love that this is my own handwriting!

With so many collections released by GCD, it's hard to pick a favorite, BUT the "Charleston" collection might be mine!  :)  The colors of some of the papers were perfect for this page about my little man.


I cut a whole bunch of 1/2" strips of the different patterned papers, and glued them to a scrap piece of paper at a 45 degree angle.  Then I cut that piece and added a thin strip on the left side of my page and a larger piece on the right.  This is also a great technique to use up some of those paper strips that are left after trimming the barcode off your papers!


I added some stitched over the seams. and fussy cut some flowers and scattered them on the page.  My journaling is along the left edge.

My title I actually wrote by hand with an app on my iPad, saved the image, and then used my die cutting machine and SCAL2 to cut it out!!  I love that this is my own handwriting!  :)


Thanks for stopping by!

-Audrey

Audrey Yeager GCD Studios DT, 2012 GCD Studios Layout Gal

3.08.2013

Welcome The New DT on Page 4

 photo GCDStudiosThePaperCut313CoverLarge_zpsde5c6751.jpg

Hands down this is my favorite issue ever! Every time I look at this cover, I laugh and get excited for Easter. I had the BEST time making these little egg people and bunny.

Oh and about the NEW DESIGN TEAM... Simply GO HERE and look at page 4 in the March issue. The new team is so talented and ready to create! We can't wait to hear what you think of this months issue! So please do share your thoughts. Oh and remember to give congrats to the newbies :)


3.05.2013

A Fast and Cute Layout to Make

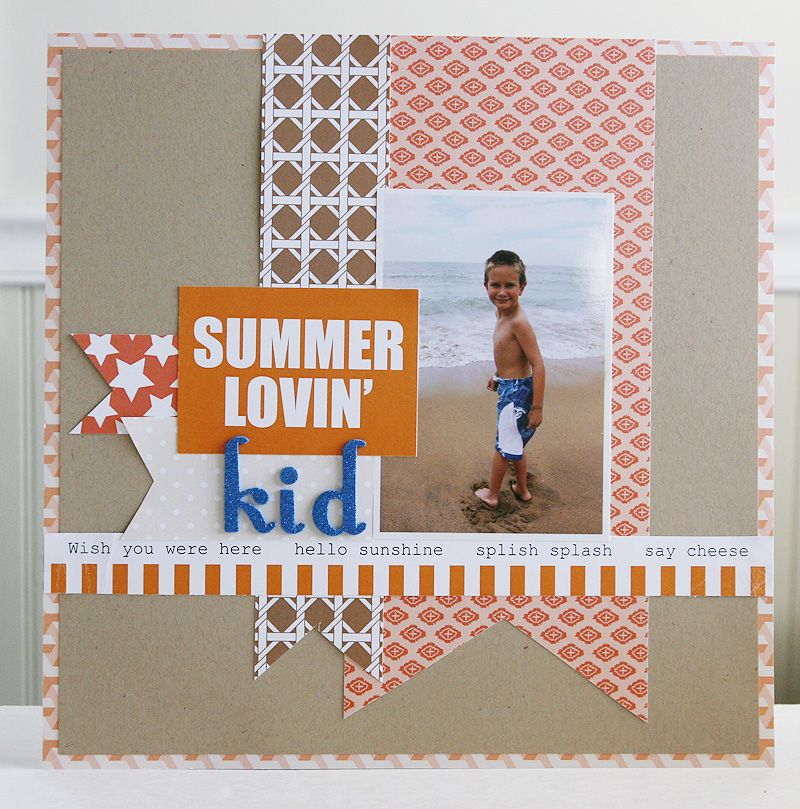
Hello GCD Friends!  Today I have a layout to share made with the NEW Sunkissed collection.  It's a great combination of bright and summery colors!

This was such a fun and easy layout to make!  After starting with my patterned paper background, I added the next layer of kraft cardstock that goes perfectly with the sand in my photo. From there I layered in the 4 different banner flags, and my title. What a great way to remember our day at the beach!

3.04.2013

Strips of Papers In A Similar Shade

Hello everyone!  Audrey here to share a layout with the new "Pure Bliss" collection.  I LOVE LOVE LOVE the prints and colors in this line.  Although the colors are a bit on the pastel side, they still worked perfectly for this photo of our family in the fall.


I cut and distsressed some strips of papers of a similar shade and then stitched them to create a mat for my photo.  I used some more strips on the bottom left of the page and an area to ground my title.  I stitched around the photo to create a frame.


I used a heart stencil and the crossword paper, and brushed with some watered down blue paint.  Then I cut the hearts out and outlined them with a black pen.  I fussy cut some flowers and come circles and layered them across the page.  For my journaling, I just wrote on some strips of paper and scattered them around the page.


Thanks for stopping by today!!


Audrey Yeager GCD Studios DT, 2012 GCD Studios Layout Gal

3.01.2013

17 new team members :)

Okay... I just made the last few calls and everyone said "Yes". WOOHOO! Congrats to the new girls and thanks to everyone that tried out.
~H

PS We will be announcing the new team on March 8th. That's next Friday... so don't miss it. We will also be going a give away :)

7 Calls Down and Just 6 More To Go.

Good luck everyone :)
~H

Calls are going out today.

This is my favorite part of the job. Today I'm making all the DT calls and welcoming the new girls to the team. So far I've made 3 calls and I just adore these girls!

Hang in there... I might be calling you next!
~H

2.28.2013

THE CUTEST BABY BOX! EVER!

Good morning everyone!  Tegan here and I am excited to show off this project I made with the Pure Bliss Collection.  I love that the color palette is so soft and sweet.  For my sister-in-law's baby shower a couple years back we made baby shoe party favors out of paper.  I just loved making those cute little things and I thought they would be so adorable made with the Pure Bliss collection.  And I was right-just take a look!  I made this as a table decoration, but you could also use it as a gift box!

I found a number of free baby shoe template's online. 
You can find the one that I used by clicking here.  
The boxes are 2 round paper mache boxes I recently picked up at my local craft store.
1) First paint the boxes with a soft pink acrylic craft paint. Let them dry.
2)  Measure the height of each box and the length around the outside of each box.
3)  Cut strips of scrap paper or cardstock that are the same measurements as the height and length around the box.
4)  Cut pieces of the Pure Bliss paper that are the height of each box and 3" wide.  Adhere these pieces side by side covering the entire strip.  Place the adhesive in the middle of the squares, so that when we run these pieces through the sewing machine, your needle won't get sticky.
5)  Run the paper "seams" through a sewing machine using a zig-zag stitch.
6)  Adhere this completed strip around each paper mache box. 
7) Decorate the box as shown.

Thanks for stopping by today. And as always, have a great day!
~Tegan

Supplies: Pure Bliss Collection- Happy Hoops (2018), Dainty Floral (2024), Diamonds (2029)
Tegan Skwiat GCD Studios DT, 2012 GCD Studios Layout Gal
              

2.27.2013

Getting Scrappy With Charleston


How fabulous is this?  Guiseppa here, to share with you a layout I made using the Charleston Collection by Diane Kappa.  When I first saw this collection, my jaw dropped.  I love the soft color palette and designs that would work for both feminine and masculine layouts.


I cut the title using my Silhouette and paper from the Charleston collection.  I kept this layout pretty simple...the title acting as an embellishment.  


I cut a few flowers out from the patterned paper as well as some paper strips.  I used foam adhesive to give the flowers, title and pictures dimension.  I love how I didn't have to add a lot to this layout to make it look good.  The patterned papers speak for themselves...simply a brilliant collection.  Hope you have all enjoyed my project and are inspired to get creating with GCD Studios!


2.26.2013

A Little Something

Hello friends!

I'd like to share a little something I made with the brand new "Indian Summer collection" from GCD Studios.

Supplies:
Cardstock: (cream) the Paper Co., Patterned Paper: ("Rose Garden", "Zig Zag", "Tori Floral", "Prettty Paisley" from the "Indian Summer" collection) GCD Studios, Stamp: Penny Black, Ink: ColorBox, Twine: Divine Twine, Buttons from Stash.
Size: 4.5" x6.5"

"Indian Summer" is perfect for those of you who like a subtle, faded palette. Soft blues and zesty yellows are paired with neutrals like cream and gray to create a tranquil, end of summer feel.

for my card, I cut a banner from a yellow stripe and matted it with a chevron for a bit of pop. The blue flowers cut from the "Rose Garden" paper create the perfect finish touch.

So what do you think of "Indian Summer?


2.25.2013

A Card using SunKissed

Happy Monday Everyone!

Today I have a happy little card to share and I used the sweet Sunkissed collection. I got to use my two favorite papers - the adorable Swim Lessons and Oh Lucky Me papers.


Isn't this roller skate from Lazy Days so fun? I topped off the blades with some shiny pearls, and if you look close enough in this picture, you can see the reflection of me behind the camera!


I hope you enjoyed my card using Sunkissed and thanks so much for stopping in!


Blog: http://bearydocardsinc.blogspot.com/

2.24.2013

Using Sun Rays on a Card

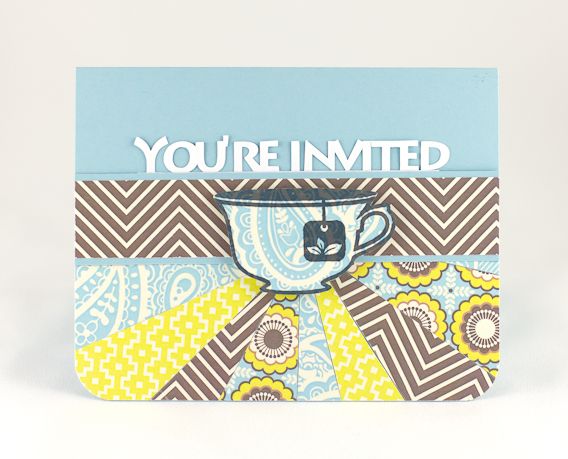
Hello everyone! Nina here to share my CHA project using Indian Summer Collection. The sweet colors and patterns remind me of a tea party so I made an invitation card.

Supplies: All patterned paper from Indian Summer Collection. Maria Floral #1980, Pretty Paisley #1982, Happyness #1974.

I tried the very popular sun-rays look on this card! Love how the patterns coordinates in this collection. I stamped the cup on some pattern paper and cut it out. The sentiment was cut from white cardstock using my Silhouette.


Thank you for stopping by! Happy Crafting! Nina Yang GCD Studios DT, 2012 GCD Studios Card Gal

2.23.2013

Making Party Décor For A Table

Hi!  Tegan here and I am especially excited to share this next project with all of you.  Why you ask?  Because it is just so much fun!  I used the Special Delivery Collection and I must say I am loving this collection!  It is so hip, fun, and modern!  I love making party décor and this collection is perfect for parties!  I invite you to take a look~
And up close~
I used the 3D flower pinwheel shape from the Silhouette store and my Cameo to cut out the pinwheels. 

I even decorated a metal pail that I found on clearance.
I hope I have inspired you today!  Thanks for stopping by and have a great day!

Supplies: Special Delivery Collection- Dillon (2040), Sincerely Yours (2044), Jack (2042)


Tegan Skwiat GCD Studios DT, 2012 GCD Studios Layout Gal

2.22.2013

"10 Reasons I Love You"

As a mother to boys, this line has to be my absolute favorite new collection! From airmail stripes to retro images, and even florals to keep this girlie girl happy, Special Delivery is awesome! I created a "10 Reasons I Love You" page:


Using instagram photos that my little guy and I took early one morning (yes, that is me without any make-up and before I even took a brush to my hair!), I adopted a grid pattern for my page.


Using bits from "Stamp Collection" and "Jack", I filled the grid with rectangles and photos, journaling and accents.


Special Delivery was a lot of fun to work with and one collection I will return to again and again to record memories of my boys.


GCD Studios Supplies Used: Jack #2043, Scott's Stamp Collection #2046, Calvin's Race #2039, George #2037.

2.21.2013

Playing With Circular Elements

Today I'm sharing a layout made with the new Pure Bliss collection. Love this one! It was perfect to create a layout about what a great big sister our daughter is.

I used a lot of the circular elements on this page, along with some punched hearts.


Jennifer Chapin 2012 GCD Studios DT photo JENNIFER-CHAPIN.png