6.30.2011

Give away tomorrow

Hey everyone,

Today I have 2 fun posts for you and I know you are going to love them!
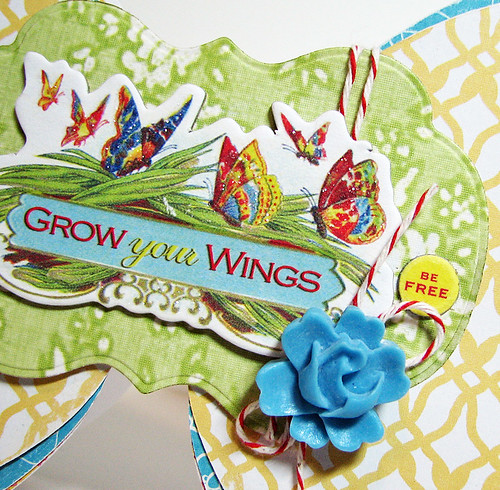
They are both so happy and bright and were created by Leslie Davis and Jennifer Chapin

I hope you enjoy them and remember to return tomorrow for our new month of July. We have a lot of fun things going on and tomorrow we have a give away :)

See you then
~H

---------------------------------------------------------------------------------------
Hi there! Hope your summer is off to a wonderful start! It's Leslie here today sharing a great technique for flowers. For this layout I used the beautiful Soul Food Collection. These papers provided the perfect floral accompaniment to my botanical page.


And the flowers a little closer...


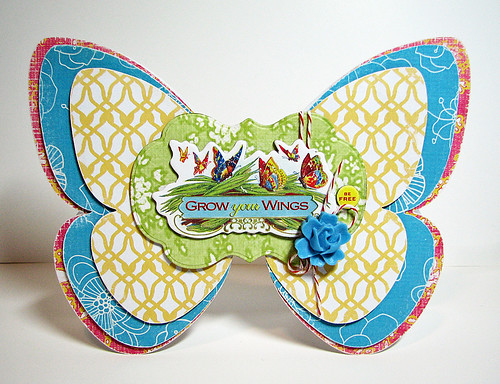
The flower shapes were cut in 1 and a half, 2 and 2 and a half inch flowers using the Slice and the Noteworthy Design card, but any style of flower in several different sizes will work. I bent the edges up to add dimension and then got to work on the flower stamens or centers.

I started by cutting fringe about a quarter of an inch into a piece of paper. The Martha Stewart Fringe Scissors were mighty handy, but obviously not necessary.


Next, I trimmed right up to the edge of the fringe, leaving just enough of a border to keep the fringe from falling apart. I applied liquid glue along this edge and began to roll it like this:


I used a paper piercer to roll it around, but a tooth pick would work just as well. Note that the pattern that is rolled inside is the one you will see the most. Once I was done rolling, I trimmed a little of the fringe off the top so that the stamen wouldn't be too tall on my page. I didn't start out with it this small because I learned that it was just too hard to handle any smaller.


Then I flipped the edges back and glued it to the center of my flowers. Here's another look at the layout.


Materials Used:
Patterned Papers, brad and borders: GCD Studios Soul Food Collection
Journaling tag: GCD Studios Fun House Collection
Letters: American Crafts (yellow) & Basic Grey (green)


-------------------------------------------------------------------------------

Hi friends! Jennifer here, and I'm going to show you a great technique today to use up those scraps of patterned paper we all have lying around. I don't quilt with fabric, but I can show you how to 'quilt' with your scrapping supplies! Let's get started.


First off, grab some patterned papers and a solid piece of background cardstock.


Cut and trim your papers in any shapes you like. Here I've done strips, but you can even do squares, triangles or any other shape your heart desires! I like to use my decorative scissors to trim a few edges too for interest. After you arrange your papers, ink the edges with a light brown ink and sponge, and adhere them to the cardstock with just a little adhesive. One great thing about sewing on your pages is that you can use less adhesive!


Stitch around the edges of the patterned papers with a straight stitch. You can alternate with a zig-zag stitch too, if you'd like.


Here's an example of just part of a piece that I've done. Once you do this across your whole layout, it's quite a lovely touch!


On this layout, I've used some narrower strips of paper from Material Girls and Homespun Chic.


Here's another quick tip for journaling - you can print computer generated journaling on patterned paper! Just be sure it's a light or neutral pattern so the type will show up.


I hope I've inspired you to grab your sewing machine the next time you sit down to create a page. It really adds such a nice homespun look and lots of great texture!
Photobucket

6.29.2011

Grow your wings

Hi!
I've created something kinda fun and summery to share today.

Wings d

I love making shaped cards, they're just so different and unexpected. For this card I took my inspiration from that gorgeous bit of chipboard from the Soul Food collection. I love the butterflies and their brightly colored wings translated quite literally into my card.

Wings

The papers are from the Soul Food and Material Girl collections and the embellishments are from the Soul Food and Funhouse collections.
Have a beautiful day!

6.28.2011

A lot of papers

Today I have a simple post and I was recently asked to define my style for GCD. I have to say my style involves a lot of papers and a lot of layering. Here is the layout I created using the Animal Crackers for Girls Collection.

IMG_5847

This line isn't just for babies! I thought it was perfect for this shot of my girl all dressed up to head out to the Nature Center. She cracks me up!

Photobucket

6.27.2011

Swim Team

Hello! Leslie back today to share this month's assignment. We were to think outside the box and create a layout with bold shapes and patterned papers. I loved this little nudge to get me out of rectangles and into circles. They are my favorite shape to work with although I must admit I forget to use them regularly.


I used a large circle punch to cut my photos and several different patterns out of the Animal Cracker's Boys line and then placed them in a grid with the title. I layered strips and two larger photos to tie it all together. Little bits and ink were scattered around. :)


Lastly, I added some wavy stitching to the title and the border to simiulate the ripples in the pool.

The little button rub ons and the turtle brad are from the Animal Crackers collection as well. The turtle was the perfect animal for this page because the mascot for their team was a snapper turtle!!

So get out of your box and go bold with your next page!


6.26.2011

Die cut borders

Hi Heidi!! hope I'm doing this right!! LOL Valerie

I just love using diecut borders on my layouts! Every layout or card I make will always have a border - and the diecut borders in the Soulfood line by Melody Ross are just so perfect! I love each and every one of them!! I like to figure out different ways to use paper, and when I saw some of the borders, they reminded me of a technique that I saw of accordion folding strips of paper to make flowers! The borders are the perfect size and shape for this! Here's my layout with two "border" flowers.


And here's how I made them! I picked out the borders that were scalloped edged and folded them accordion style at each scallop


You will have to snip off the very last scallop so that you can attach the ends properly

Next adhere the ends with some glue so that the end scallops overlap each other


You'll end up with an accordion chain. Squeeze the chain together lightly, so that all the ends meet in the middle

This is the trickiest part - carefully flip the edges of the scallops outwards - while still holding the flower together to form your flower. Here's a tip - have a small circle with a pop dot waiting for you to pop your flower on and voila! There's your flower!


I added a glitter candy dot from the Funhouse line for the center!! The possibilities are endless! Have fun creating!!

6.25.2011

What are your summer plans?

I love summer! And one of our favorite things to do in the summer is go to our friend's cabin on the lake. I did this layout using The Great Outdoors Collection.

IMG_5510

For the bottom border I made my own logs by cutting papers into 3x3 squares and rolling them around a pencil. I then swiped some glue on the ends and voila, logs for the fire!

Here is a close-up of the log details:

IMG_5513


What are your summer plans?

Photobucket
On May 19, 2011, at 7:06 PM, Heidi Sonboul wrote:

6.24.2011

News about Brave Girls contest

Tomorrow is the last day to turn in your projects for the Chipart tool Brave Girls Contest.
Good luck to all those that entered.

And now here is Teri....

___________________________________________________________
Hello all!
Teri here! I’m happy today to be back on the GCD Studios blog today.
We were challenged this month to define our style.
I like to go many ways when I make cards, but the style I gravitate to the most is clean and fun.
This card is the perfect example of my style.

This card doesn’t have too much on it, but it’s got enough patterned paper and embellishments that make it interesting.
And here is one more example of my clean style.

There again isn’t too much on it, but there’s just enough embellishments on it to keep it interesting. The birds fly across the card, and the sentiment keeps you reading the words.
I have a few tricks for you to use when you make clean and fun projects:

  1. Limit yourself with the embellishments you use. I like to keep the number of different embellishments I use on cards to seven or less. Any more, things just seem a bit too crowded.

  2. Keep the project focused on the card’s purpose. With the first card, I wanted to make an encouragement card that focus on the “Learn the Lesson” message. Everything I added (the additional words and even the bird) steered focus on the message.

  3. Be sure to obey design rules. Apply the rule of thirds, balance and symmetry to your projects.


terisplace.wordpress.com

6.23.2011

The Great Out Doors

When I think summer, it's not just sunshine & sprinklers that come to mind...it's worms & stink bait. Ha! I am the mom of two boys and a little girly who will soon become a second generation {tomboy}. Yep, we're an outdoor kinda family. So, when our June theme came up as "summer", I knew The Great Outdoors line would be my first choice to work with.

Every element in this line was perfect for this fishing picture of my boys...
Photobucket
Photobucket

Photobucket

6.22.2011

3 days left to enter the contest + Chipart project

Hey everyone,

If you are planning to enter the Brave Girls camp contest.... you only have 3 more days to enter. The 25th at midnight PST is the cut off date :)

Just thought I'd share and now here is Rebecca.
~H
_________________________________________________________


Usually when you are prepping a piece of chipboard for embossing with the GCD Studios Chip Art tools, you spray and slightly moisten the chipboard. This softens the chipboard enough to allow an impression to be made. For this technique, you are going to use an ink mist to moisten the chipboard. It provides a hint of color, shine and shimmer (depending on the mist you use) and adequately softens the chipboard for embossing. These are the supplies you will need (a piece of chipboard, the GCD Studios Chip Art tools including the mallet, block, and plate, spray mist and chalk ink.


You will start by misting your chipboard piece:


You want full coverage without making it sopping wet (because you dont want the chipboard to fall apart when you start banging on it).


Next, use the Chip Art tools to make impressions in a pattern on your chipboard.


I applied mine randomly and made sure to have several hanging off the edge for a fun look:


Finally, you can ink the edges with a darker chalk ink for definition:


And you are left with a pretty handmade chipboard piece to be attached to layouts or cards.


I added mine to this layout:


Of course, I couldn't resist adding one of those gorgeous Cabochons from the Funhouse collection as the finishing touch!