
Hello! today I am sharing a funky technique, Creative Lettering on your projects. You can draw your own fonts, use your own handwriting or trace computer printed fonts.
Creative Lettering is an easy technique to use on anything, you simply need to have a pen and some confidence.
I am sharing this framed art I made showcasing a quote printed with a mixture of different lettering styles, all created with my pen.

Supplies-
you will need an 11x14 stretched canvaspaint- lime green, white and sky blue acrylic paint with brush
fabric roses
crackle paint
rubon stitching
leaf pins
Gcd Studios Supplies- Melody Ross ChipArt tools- (Mini Shapes Ornamental Stamps and Chipboard butterfly kit) Ava Collection papers (Topaz and Flutter) Artsy Urban ( Vintage Buttons) Homespun Chic ( Gem Brads)
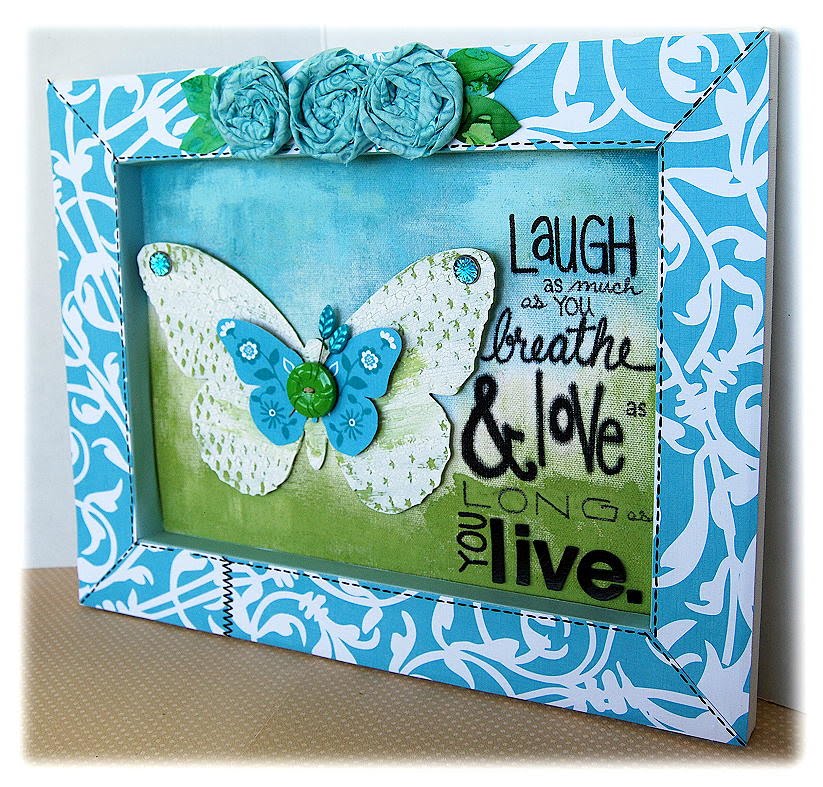
First, you flip the canvas to the reverse side, and using that side, paint the canvas on this side, swirling the green on the bottom and the blue to the top. Allow to dry.
Using your Chipart Tools, stamp the small star and diamond shapes on either side of the butterfly. Paint butterfly with the green paint, allow to dry, paint with crackle medium , allowing it to dry for two hours , then dry brush with white paint, and allow to dry.

Put two blue gem brads in the holes on the butterfly, then fussy cut blue butterfly from patterned paper, add button and two leaf pins. Put this aside.

Decide where to place your quote, then lightly sketch in your lettering with a pencil. It's quite easy to fix mistakes with a pencil. If you need ideas on what lettering styles to use, use your computer and search out fonts. I created my quote with a variety, keeping the reader interested by adding in thick and thin letters, even allowing the color to bleed a little made the lettering interesting. Using thin pens and thick markers makes drawing the letters easier. I used a thin pen and a sharpie marker to draw mine.

To finish the canvas, I added strips of paper around the frame, covering the ugly edges, I then used rubon stitching to finish off my frame, on the mitered corners and a bit of paper that wasn't long enough to cover the length of the frame. I added my three fabric roses at the top with a couple handcut leaves.
I hope you have enjoyed my project today!
have a fabulous day!
kris
love this!! Amazing lettering!
ReplyDeletesuch a CUTE frame! love the colors and the butterflies. your lettering is awesome! thanks for sharing :)! have a wonderful day! *hugs* steph :)
ReplyDeletePerfectly fabulous in EVERY way!!!
ReplyDeleteSimply fabulous! And inspiring! Although, if I tried it. I think mine would look quite hideous! :)
ReplyDeleteGorgeous Kristen! The lettering is fab!
ReplyDeleteLove this!! Your lettering and canvas are beautiful!
ReplyDeleteThis is FANTASTIC!!! Love it!!!
ReplyDeleteThis is darling!
ReplyDeleteKris this is incredible! I am so inspired & want to make one tonight:)
ReplyDeleteso cool! I got to try to make one! TFS
ReplyDeleteI LOVE the Green and blue combi ! The canvas is fab!!
ReplyDeleteGorgeous!
ReplyDelete