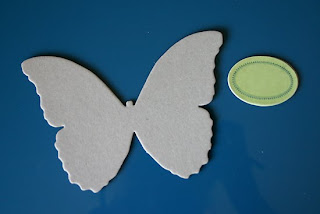
 Supplies:
GCD Studios
Chip Art Tools: Hammer, Block, Mister, and Paint brushes
Chip Art Ornamental Stamps: Mini Shapes, Butterflies, Bloom, Rose, and Leaves #2
Chip Art Alphabet Stamps: Sparrow Uppercase Alphabet
Chip Art Chipboard Shapes: Butterflies, Stars and Birds
Embellishments: Homespun Chic Vintage Labels
Other supplies:
Gold cord: Stampin' Up!
Gold trim: unknown
Pearls: Hobby Lobby
Paint: Plaid Folkart
Pearlizing Medium: DecoArt
White Gel Pen: Uniball by Signo
Instructions:
Start with your chipboard shape (Chipboard Butterfly) and choose one of the Vintage Labels to go with it.
 Choose the paint colors you want to use. (These are the colors I choose, along with a pearlizing medium. This stuff adds a gorgeous shimmery shine to your projects! )
 After you have selected your paint colors you will paint your chipboard shape.
(I painted all of the chipboard shapes using the Parchment color to give them all a nice neutral background. This helps show off the stamping and coloring of the images.)
 Next determine the placement of your label.
(This will help you decide where to do your stamping as you create your design.)
 Once this is done, start creating your design, making sure to vary the placement of the various dies. You do not need to mist this piece. Just make sure the paint is dry to touch before you begin this step.
 Next, paint the designs using a small, thin paint brush and the colors of your choice. After the paint is dry to touch, use the white gel pen to add details and to color in the smaller images.
 Finish this piece by applying a light coat of the pearlizing medium. See the nice shimmery shine it adds!!!
(I did not mix it with any paints as suggested, I just applied it directly on top of my painted chipboard.)
 The final thing you will do with this piece is to punch a small hole in the top and tie a piece of gold cord through it. Now set this piece to the side as you create the sentiment.
 Finish this piece by adding gold trim and pearls to the outside edge. Adhere to the top of your chipboard butterfly and your ornament is complete!
 ..........................................................................................
Here is the second ornament I created. For this one I used the Chipboard Bird and the Rose, Mini Shapes and Leaves #2 stamps.

 And the third one in my trio...a star! For this one, I used the Chipboard Star and the Bloom and Mini Shapes stamps.
 I hope you enjoyed this tutorial today and that you find yourself inspired to do a little Christmas crafting!
Happy Hugs!
Juliana
Juliana


These ornaments are beautiful! I especially love the dove! So creative and just in time to crank some out for Christmas!
ReplyDeleteLove the Chip Art tool, you did a wonderful job with your ornamnet. Love the bird, so pretty
ReplyDeletehttp://pammejo-scrapbookflair.blogspot.com/
These are beautiful!! They would indeed make a great gift!
ReplyDeleteJuliana, these are stunning! I am totally doing this!
ReplyDeleteJuliana this is really nicely done ! Love it ! :)
ReplyDeleteJust gorgeous ornaments! I love how these turned out!!!
ReplyDeleteWOW! These are gorgeous Julianna!
ReplyDelete