Teri here again.
And I'm here to bring you another post on the GCD Studios blog.
Today, I want to show you how to make shaped cards with GCD Studio's Chip Art chipboard shapes. The cool thing about GCD Chip Art shapes is most of the packs have a few large shapes.
These are super fantastic for making cards.
You can go to town and decorate them up. Then, you simply have to set your completed shape on cardstock and draw an outline of the shape. Cut out your outline. Add a little glue to the top of it and place it behind your shape. Bend it a little and your shape will stand freely and you'll have a card.
It really is that easy!
I have two cards to share with you today that I made with the Chip Art chipboard shapes.
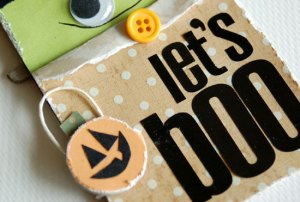
The first card I made was this little monster.

The rectangle base is a Chip Art chipboard shape. I covered it up with papers from the Independence and Smoothie Shoppe collections (as well as cardstock). I added the face, letters and button (that's from the Artsy Urban collection).

I also made the pumpkin with a Chip Art chipboard circle. I covered it with the orange backside of paper again from the Smoothie Shoppe collection. The pumpkin's stem was cut from green polka dot paper from GCD's Joyful Peace collection.
I also made this shabby little red house.

I used the Chip Art tool to give the house's roof texture. I also used it to give the tree leaves.

I placed patterned paper from GCD's Ava collection in the house's windows.
Teri
for GCD Studios

Very cute! I love the little house and tree. That would look great framed as a home sweet home type wall hanging.
ReplyDeleteCute stuff!
ReplyDeleteLove that little monster guy!! How fun?!
ReplyDeleteI love that monster! Too cute!
ReplyDeleteHow totally cute BOTH are!!! FABULOUS!!!
ReplyDelete