4.30.2010

Spray it thoroughly

Hi! It is Kim here bringing you a technique with the wonderful new GCD Chip Art tool.

Over my years of scrapping I have used a LOT of chipboard and to say that I was excited when I saw a new tool for working with chipboard released by GCD Studios might have been an understatement.

I love the Chip Art tool - I love the texture it can provide so easily to a piece of what would otherwise be plain chipboard.

This is the layout that I created to demonstrate my technique ...


And this is how the chipboard will look when it is finished ...

technique - fly (5 of 8)

All papers and embellishments on this layout are from the Homespun Chic range by Melody Ross.

For this technique I have used Lemon Maya Mist by Maya Road - it has awesome coverage and ends up with this beautiful gold metallic finish.

Step 1: Select a raw chipboard piece - I have used a flower from this set.

Technique - step by step photos (1 of 8)

Step 2: Spray it thoroughly

Technique - step by step photos (3 of 8)

Step 3: Allow it to start absorbing into the chipboard

Technique - step by step photos (5 of 8)

Step 4: Before it is completely dry, use the Chip Art tool - you will see that the mist will absorb into the chipboard as soon as you apply the tool.

Technique - step by step photos (6 of 8)

Step 5: Work around the chipboard piece

Technique - step by step photos (7 of 8)

Step 6: Allow to dry thoroughly - this can take a while - then use a hole punch (I used a crop a file from We r Memory Keepers) to pierce a hole and then use a decorative brad for the centre.
Technique - step by step photos (8 of 8)
I love this effect and I know that I will keep experimenting with this great tool!

Cheers
Kim

4.29.2010

Fresh and springy!

That is what I thought when I saw this month's theme pics from GCD Studios.

Isn't it gorgeous! I just love the combination of all the different shades of pink and green with the white!

I came up with a couple different interpretations...

This first one is a little more frilly than I usually am, but I really had fun bringing out my inner girly girl.
Supplies: (All GCD Studios unless noted)
Patterned Paper: All from the Melody Ross 8x8 Homespun Chic pad, Frame: Melody Ross Homespun Chic Layered Frame, Rhinestone Brad: Melody Ross Homespun Chic Gem Brads, Butterflies: Melody Ross Homespun Chic Chipboard Ladies pack, Cardstock: (white) Georgia-Pacific, Flower: Prima, Embossing Folder: Provocraft, Border punch: Fiskars, Stamp: Hero Arts, Ribbon from stash
Size: 5x7"


When I saw the theme I immediately knew I wanted to use that gorgeous pink and green Layered Frame from the Homespun Chic Collection...YUM! I added a couple of chipboard butterfly stickers to bring the eye in even more.

Next up is a card that is probably a little more "me".

All those fab flowers in the challenge piece inspired me to create a flower of my own. This is just your basic layered circle lollipop flower, the twist is distressing each layer to within an inch of it's life and curling the edges up a bit.

Supplies: (All GCD Studios unless noted)
Patterned Paper:Melody Ross 8x8 Homespun Chic pad, (green) Smoothie Shoppe Collection, Border strips: Melody Ross Homespun Chic Diecut borders, Rhinestone Brad: Melody Ross Homespun Chic Homespun Brads, Chipboard frame: Melody Ross Chip Art Medium Frames, Chip Art Stamp: Flourishes, Cardstock: (white) Georgia-Pacific, Ribbon: The Dollar Tree, Additional Rhinestones: Kaisercraft, Stamp: Hero Arts, Paint: Plaid
Size: 4.25x5.5"


I also broke out some beautiful die cut boarder strips and my Chip Art Tools again. After stamping and painting the chipboard, I added a mix of pink paint and paper glaze, then wiped off the excess. It's such a different look that the brown paint (which gives and antique appearance), can't wait to try this more with other colors!

So, what can you do with those theme pics?

Have a sweet day!
Heidi

4.28.2010

a great focal point to a layout

TECHNIQUE LAYOUT
by Megan Klauer

I love how just folding a strip of paper can add such a great focal point to a layout, card or project. I used a few simple products to create just that.
You'll need:
2 strips of patterned paper {I used 1/2" x 12"}
circle punch {I used 2 5/16" by The Paper Studio}
Sticky Strip {by Stampin' Up!}
Photobucket
1} Punch circle from pattern paper {would work great to use a photo in the center too!} and cut paper strips...
Photobucket
2} Add Sticky Strip to the back of each paper strip & adhere circle to layout or project...
Photobucket
3} Start creating the "ruffle flower" by simply back folding the strip of paper as you continue around the circle using both strips of paper...
Photobucket
Photobucket
and all finished!
Photobucket
and here is how I used them on my layout...
Photobucket
Photobucket

Photobucket
Layout supplies:
Cardstock: Stampin'Up!
Patterned Paper: Collections - Homespun Chic
Embellishments: Metal Rimmed Glass Brads - Homespun Chic by Melody Ross, Fabric Brads - Homespun Chic by Melody Ross, Textile Tags - Homespun Chic by Melody Ross
Punches: Martha Stewart, The Paper Studio, Fiskars
Chipboard letters: Cosmo Cricket
Precision Pen by American Crafts & Sharpie Marker
Adhesive: Xyron & Sticky Strip by Stampin' Up!

4.27.2010

Nest Pedestal

Hello everyone!
Today, i shall share with you a simple off the page item which i managed to create in less than 15 minutes.
Some essentials you need include :
1 cardboard roll
1 embriodery hoop
Homespun chic collection - Pink Stitchery
Faux nest and bird
Moss
Ribbons
Fabric

1. Ring fabric onto the embriodery hoop.
2. Surround the wooden edge with double sided tape. Surround with die cut border.
3. Tie the adjustment know with ribbons.

4. Affix pattern paper around cardboard.
5. Place embriodery hoop above the cardboard. You may with the use hotglue to attach.
6. Decorate with nest and other decorative items.
Viola.
Looks pretty easy isn't it ?
It really is simple.
Do keep a look out for items at home... you never know what treasure you'll find !

Happy day !
emeline

4.26.2010

Spring cleaning always wins!

For some reason (and I think a lot of you can relate) each spring I start tossing things into boxes, cleaning out drawers, and going through everything trying to figure out how to get my house organized better. Each year I try to fight it – but the “bug” of spring cleaning always wins!
This Spring I am determined to find a better way to organize my life. Since I serve as the volunteer coordinator at my kids' school – I get a lot of calls. While I tell my kids and hubby to “just let the machine pick up the messages” they always seem to be caught off guard when the calls start rolling in – and let’s just say they are not the best at remembering who called, or where they placed that message they know I will need – awh I love them ;)
So – in the spirit of getting more organized this spring I designed a little phone message board that will be sure to make remembering who I need to call back that much easier.
For this project you will need the following:

1. GCD Pattern Paper (I chose to use the Homespun Chic collection by Melody Ross)
2. GCD Brads (Again I chose to use the Homespun Chic collection by Melody Ross)
3. 6x6 cork board
4. Ribbon
5. A Stapler
6. A 6x6 Shadow Box
7. Scissors
8. Crackle or white paint
9. Sand Paper or a Paper File
10. A Ruler
11. Pen or Pencil
12. Pins
Step 1:
Prep your shadow box. My shadow box came with a hard plastic pane – so the first thing I did was remove it. I then slightly sanded off any imperfections in the wood to prep for painting. I then painted my shadow box and set it aside to dry.
Step 2:Using your ruler find the center point on your cork board – mark it. Cut off 6 pieces of ribbon large enough to cover the front and wrap around the back of your cork board. Then take your first ribbon starting in the upper left hand corner and stretch it across your center point to the lower right hand corner. Now using your pins – pin it to each corner so it doesn’t move. Next, take 2 ribbons and place them to each side of the middle – you can either eye ball this or measure it – but you are going to pin these ribbons so that you have even space from the edge and the middle ribbon. Pin and secure. Turn your cork board and repeat the process for the last 3 ribbons (finding center) and then placing the remaining two.
Now take your brads and place them over the top of the 2 intersecting ribbons (see picture) secure these to the back by flatting them out.


Take another piece of cork board and place it on the back side of the first cork board. Pull up each ribbon tightly and staple each strain to the back. Trim off the excess ribbon.
Step 3:
After your box is dried – place your cork board inside and decorate the outside with pattern paper. There you have it – a phone message center that will keep you organized this spring!

Jennifer W

4.25.2010

Happy Sunday everyone!

Happy Sunday everyone! I have my themed cards to share with you today. I know you may have seen this image already, but it is just SO pretty...that I have to post it again!


I was so inspired by the pink, green & white, the jewels, the flowers....everything about this image. I just love it! Here is my first card:


All supplies except the ribbon and lace trim are from the Homespun Chic line by Melody Ross. This paper is so wonderful, and glittery, and full of texture...it just makes me want to {sigh}. I hand-cut some of the flowers and roses and added them to give it more dimension.

And here is my second card, along with a little detail shot. I can't take credit for the paper rose technique on this one...I learned how to do it on a fellow paper crafter's blog. I love how it turned out though...especially after glittering it!


Leah

4.24.2010

Mix of gold, maroon, and black

Hello everyone!! So excited to be here sharing with you all today :) When I printed off this photo of my son I knew the color scheme was perfect for the GCD Studios Artsy Urban line. I just love how the mix of gold, maroon, and black in the patterned papers totally complimented the pic.
Photobucket
I definitely love to layer, and this layout was no different. I used a combination of the border strips, inspiration cards, mat pads, journal cards, chipboard stickers and patterned paper to incorporate a number of patterns & colors into layout.
Photobucket
I also wanted to add some dimension to the layout as well so I used some punched patterned paper & chipboard to create this cute flower.
Photobucket
The flower was super easy & quick so I thought I would take a moment to share how you too can create this flower to use on your layouts.
Handmade Flower Tutorial:
#1 First off, you will need 2 sizes of flower punches, patterned paper, paint, mist, twine, a chipboard circle, a thin paintbrush, and sandpaper.
Photobucket
#2 Begin by punching 2 flowers of varying size. You want to make sure the patterned paper is double-sided because you will see both sides in the final flower.
Photobucket
#3 Use the end of a thin paintbrush to curl up each petal.
Photobucket
#4 Do this to every petal on both punched flowers.
Photobucket
#5 Attach the smaller curled flower on top of the larger curled flower. I used a thick pop-dot so that the smaller flower was slightly raised above the larger.
Photobucket
#6 Now you will need to create the center of the flower. Paint the front of a small chipboard circle & spray a light coating of mist on it. Once dry, sand the edges a bit to give it a distressed feel. Punch 2 small holes near the center to create the "button".
Photobucket
#7 Using a piece of twine, tie a small bow through the holes of the button. Adhere this to your flower & voila - a fun & easy handmade flower to add to your layouts!!!
Photobucket
- Julie

4.23.2010

Hello! Its Windy Robinson again and I am so happy to be back at the g.c.d Studios blog. Its inspiration time...
...when I saw this image, I fell head over heels for the top two photos. I just love the cream and dusty pink color combination in the top left photo and the white, green and pink combo in the top right. I used this as an opportunity to create a couple of thank you cards to keep on hand. I hope you enjoy:)
Patterned paper (Homespun Chic collection: 8 x 8 paper pad and Independence collection: Lexicon); chipboard (Chip Art Medium Frames); tool (Chip Art mini shapes stamp); cardstock (white and cream); thread (Coats & Clark); paint (Making Memories); ribbon (Offray), clear stamp (Hero Arts), border punch (EK Success)
Patterned paper (Homespun Chic collection: 8 x 8 paper pad and Independence collection: Lexicon); embellishment (Homespun Chic Layered Frames); cardstock (cream and kraft); clear stamps (Hero Arts); thread (Coats & Clark)

4.22.2010

From fabric... to tissue paper!

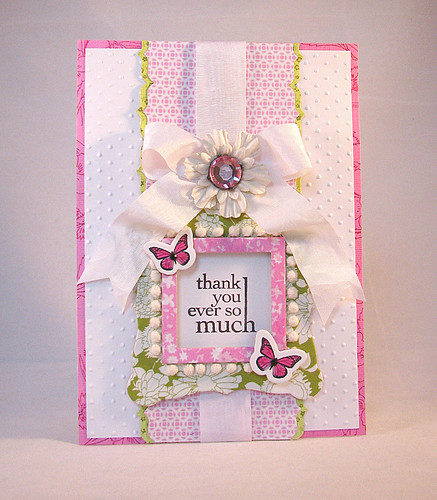
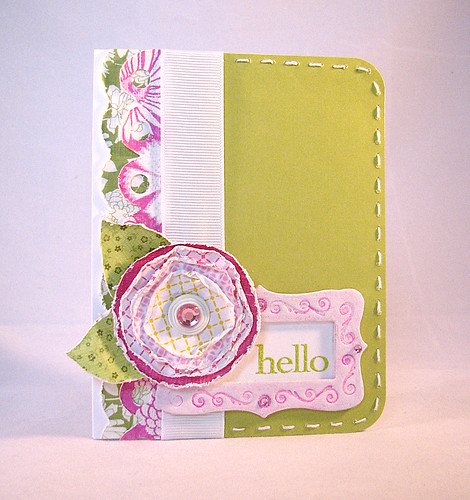
Hello there! Kristen here with a pretty vintage looking flower for you to create.

One of the hottest new trends out there is making your own flowers, from fabric to tissue paper, they are all just gorgeous. I have created a flower with a sewing pattern tissue paper and the possibilities with these flowers are just endless.


You will need a sewing pattern, and leave it folded. I also used a nicely large punch to punch out my flower shapes. Tissue paper/sewing paper is pretty delicate, I found that leaving the sheets folded gave me just the right thickness to punch cleanly through the paper. If it's too many, it won't punch and too few will tear through the paper more then punch through it.

Next, you are going to use micro mini glue dots to adhere the center of the flower on each layer of paper.


I then used a hole punch to punch through the middle of the flower center.


Next, scrunch the flowers.


And to finish, add brads, gems, buttons, crocheted flowers, etc.. to the middle of your flower, re-scrunching the paper petals to just the right shape.


Now, for the project I made with these flowers, a butterfly banner, perfect for my scrapbooking space.


I recommend you enlarge this photo to see all the details.


To make this banner you will need:

GCD studios
Ava Collection- Teal Pinwheels, Emeral, Topaz, Flutter, Quartz, Crosshatch, Big Mod, and Sunny Pinwheels
Homespun Chic- fabric brads
Artsy Urban- Crochet Flowers, Vintage Buttons
Chip art tools and Chipboard- Melody Ross chipboard butterfly book, Sparrow Upper Case Alphabet
Vintage Floral, Iron Works, Butterflies, Mini Shapes

other- ribbon (teal, black and green) gems, twine, white acrylic paint, spray glitter mist, black spray mist, black pen, yellow and blue metallic cream rub ons, buttons.

First, I used my chipart tools to deboss my butterfly shapes, adding different shapes to each butterfly and creating a word along the edge of the butterfly.


Second, I painted my butterflies with white acrylic, then misted them with black spray mist. I then painted them a second time with my white acrylic paint. When dry, I highlighted the words with a black pen. Then added metallic cream rub ons to the edges of the butterfly, mixing them lightly at the meeting point of the two colors.


Finally I added three circles to the centers of the butterflies, adding smaller and smaller layers, adding foam tape between the second and third layers. Each butterfly uses three different pattern papers.

I then cut out a butterfly from the Flutter paper and adhered it to the top circle. I then spray glittered all three butterflies.


After allowing the butterflies to dry, I added my sewing pattern paper flowers to the center of the butterflies. I also tied each butterfly together with ribbons, adding several buttons tied on a piece of twine to each tie. Then I added two additional cut out butterflies hanging down between the larger butterflies.

I hope you have enjoyed both my paper flowers and my butterfly banner today.
kris