6.30.2012

Die Cut Week: Lovely Layers

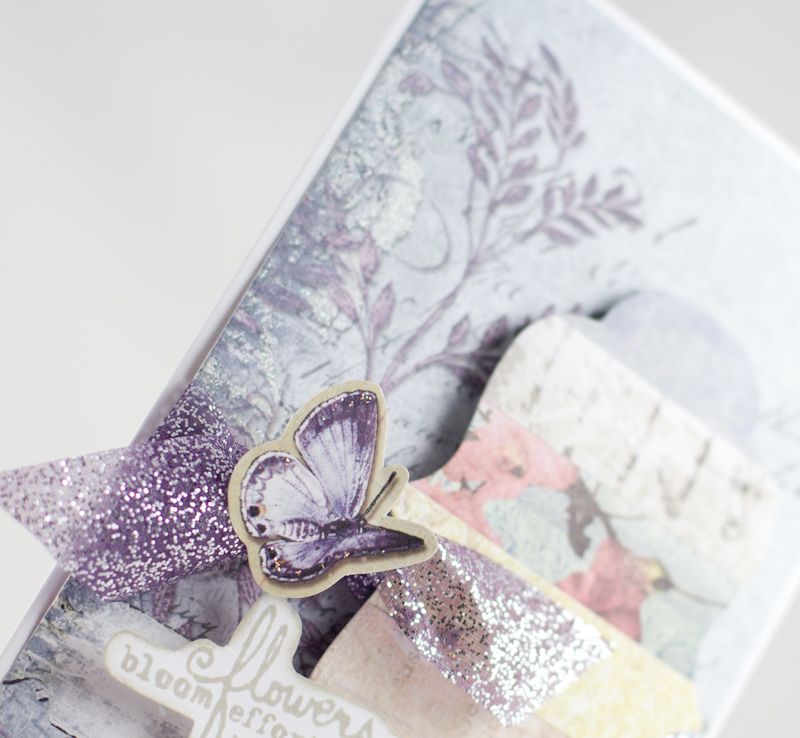
Hello everyone! Have you enjoyed all the fun die cutting projects this week? I think a die cut machines is a paper crafter's best pal :) Today I am sharing two more projects using dies. I layered some strips of paper on a piece of thin printer paper and cut it out with a label die to use on a card:

By: Nina Yang

Supplies: Magical Paper (1714) - Botanique, Imagine Paper (1713) - Botanique, Stationery Paper (1715) - Botanique, Elegant Paper (1710) - Botanique, Botanique Alphas Paper (1708) - Botanique, Grandma's Pearls Paper (1712) - Botanique, Botanique Beauty Paper (1707) - Botanique, Bliss Paper (1706) - Botanique, Comfy Paper (1709) - Botanique, Botanique Cards Paper (1705) - Botanique

The Botanique collection is designed by Donna Salazar and is definitely something out of my comfort zone. I love how this card turned out. Inspired by the glitters on the paper itself:


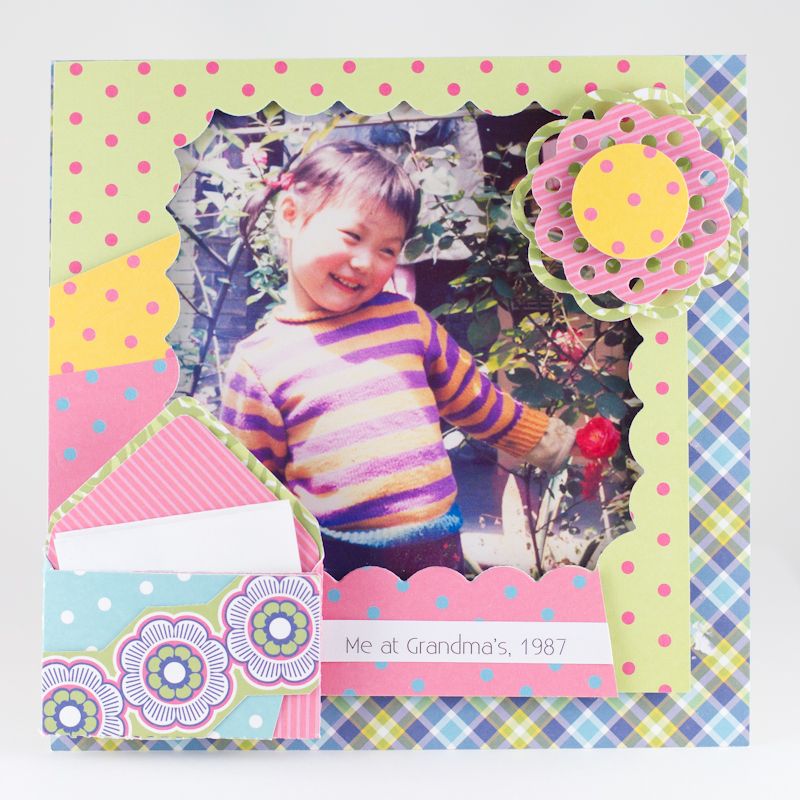
My second project is a photo frame (finished size: 6"x6")

By: Nina Yang

Supplies: Swirling Paper (1648) - Flower Child, Organic Geo Paper (1645) - Flower Child, Wondering Geo Paper (1638) - Flower Child, Flower Child Plaid Paper (1639) - Flower Child, Striking Stripe Paper (1647) - Flower Child, Flowery Paper (1641) - Flower Child

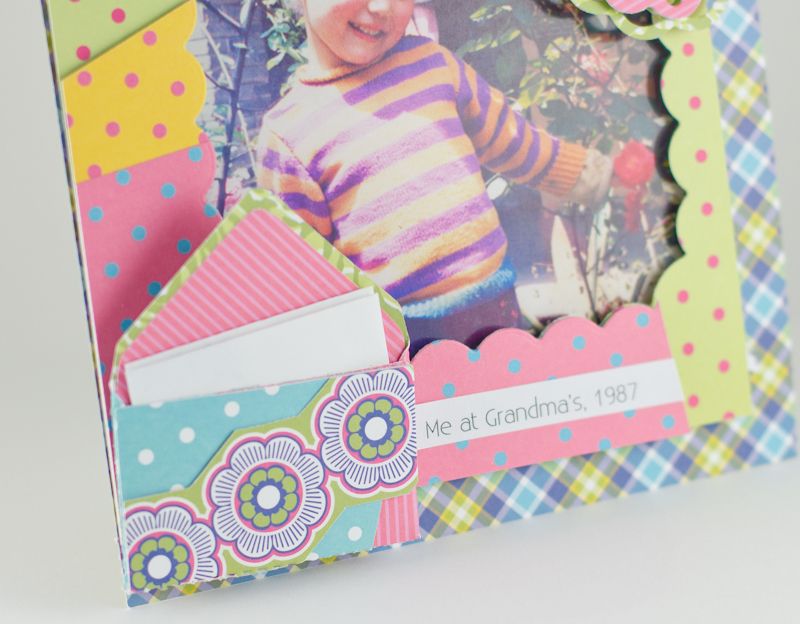
The scalloped photo border and the mini envelope are also made by layering patterned paper and then die cut:


Love the vibrate colors and cute patterns from Flower Child collection. I cut the flower border from the Striking Stripe Paper and layered it on top: it wraps around the envelope when folded:


Thank you for stopping by. Happy Crafting!

Nina Yang GCD Studios DT, 2012 GCD Studios Card Gal

6.29.2012

Die Cut Week: Get in Shape

Hi there! I want to share a couple cards I made using die cuts today.

Die cuts are a perfect way to create your own themed embellishments. Don't get me wrong, I am the biggest fan in the world of basic shaped die cut: circles, ovals, labels etc., but for a real WOW try using something a little more specific.

Since every year I always seen to need several graduation cards that's the theme I stuck with today.

"Fly" has always been one of my favorite sentiments for grad cards. It's just such a happy positive message, plus who wants to spell out "Happy Graduation" with stickers :) This Kite die from Spellbinders was perfect to convey my message.

Supplies:
Cardstock: (white) Georgia-Pacific, (orange) Bazzill, Patterned Papers: (Chloe, Hailey from the Oh Happy Day Collection) GCD Studios, Dies: (Classic Circle LG, Classic Circles SM, Jewel Treasures) Spellbinders Paper Arts, Letter Stickers: Cosmo Cricket
Size: 4.5"x4.5"

The fun and bright papers from the Oh Happy Day collection were a perfect fit for my kite.

I also love butterflies for graduation cards, not only do they fit with my favorite theme of flight, but they also represent the change from youth to adulthood...or if that's too deep we can just go with the fact that they're pretty, lol!


The butterfly I used is also from Spellbinders and I chose to used both the negative and positive shapes.

Supplies:
Cardstock: (white) Georgia-Pacific, Patterned Paper: (Bonjour, Bouquet, Nice, Je T'Aime, Provence Floral from the Bonjour collection) GCD Studios, Dies: (Classic Circles SM, Classic Circles LG, Fanciful Flight, Ribbon Banners) Spellbinders Paper Arts, Letter Stickers: Authentique, Thread: Coats & Clark
Size: 4.25"x5.5"

The papers from the Bonjour collection add a lovely fresh feel to this design.

Do you use dies cuts? Do you just go for the basic shapes or are you a fan of the theme shapes?

Heidi Van Laar 2012 GCD Studios DT, 2012 GCD Studios Design Team, Heidi Van Laar

6.28.2012

Die Cut Week: Lots of letters

I love die cuts.
I really do.
Like really.
I tend to use them as background pieces though, so today I challenged myself to not only use die cuts as a focal point, but to use a LOT of them!
So, tell me, how do you think I did?


I just realized the main sentiment looks kinda like 'nello' instead of 'hello' with the string right there - lol! 
Anyways, I thought a matching envelope was in order - sometimes I spend so much time making a card, I forget to decorate its carrier!
So here's what I did...
On the back flap (where you'd lick to stick!)


And on the front, right before where you'd write the address...


 I didn't stick the letters on the outside (for fear they'd peel off in the shipping process) - I used the negative, and placed some patterned paper behind it.
For illustration purposes...


And one last thing - I had to peel back the back flap of the envelope so I could die cut the 'to' without cutting all the way to the back. It's super simple to just stick it back together when you're done!

Thanks so much for stopping in with me today and have a blessed one!


blog: http://bearydocardsinc.blogspot.com/

Supplies:
Splendor -  Candytuft, Labels and Tags, Floral Frame, Tiny Blossoms, and Sunswept

6.27.2012

Die Cut Week: Big Letter

Hi!  it's Amanda!  Unless you have been living under a rock, or your internet went out over a year ago, you are well aware that hexagons are all the rage in paper crafting.  I don't know what it is about these little shapes, but I am attracted by the clean lines and symmetry.  I thought it would be fun to pair modern hexagons with sweet and pretty country prints and quilt them together. 
Could this quilted-hexagon-burlap-monogram-wreath-type-thingy BE any more trendy?  There's a lot going on, but I think it works.   And it looks fantastic on my front door!

Since I wanted to stitch the hexagons, I adhered them to a piece of cardstock first.  I traced around the wooden monogram so I would know where to place the hexagons.

Trace the monogram onto the quilt and trim excess paper, leaving a little bit of an edge.  Adhere the quilt to the wooden monogram with Mod Podge and let dry completely.  Flip monogram over and trim excess paper with a craft knife.  


The trick for keeping the quilt from looking too cluttered is to stitch around a few random hexagons. 

I chose to hang this letter like a wreath, but it would also look good standing alone or in a frame. 

Thanks for stopping by today!

Supplies
From the Country Charm Collection--Floral Field 1507, Weekend Fun 1515, Farm Field Stripe 1506, Country Bloom 1505, Super Star 1511, Strawberry Jam 1510, Handycraft 1508, Cherry Pie 1504, burlap ribbon (Sierra Pacific), wooden monogram (Sierra Pacific), thread (Coats & Clark), Cricut Expression, Cricut Font & Basic Shapes digital cartridge

6.26.2012

Die Cut Week: Misting

Recently I was cutting out bunches of doily dies from pattern paper.  I was using wax paper in between the die and the paper because of the fine detail in the die.  It ended up that I had a scrap pile of pretty wax doilies that I just couldn't throw away! So, I decided to use them as masks for the misting I did on this layout of my sweet, darlin' daughter.


I wanted to pull out the vibrant greens and pinks in the gorgeous Splendor, Posies pattern paper.  


First I layed down the doily at the top of my cardstock so that only half of it was actually on the paper.  Then I sprayed it with glimmer mist.


Then I did the same to the side of my paper.  After spraying it with green I removed the used doily and layed down a 'clean' one slightly over top of the masked image.  This time I used pink to spray over it.  


After it was dry, I cut out a large circle and banners from pattern paper and adhere them to the layout.  I sewed on a few more strips and cut out some die cuts for embellishements.  I also adhered a bit of trim to soften the page up just a bit.  


 Tip ~ When spraying on to a wax paper mask, spray straight down so that none of the glimmer mist seeps under it when you spray.  And....cover your table well or use a box!


Creating masks from die cuts can give you endless designs.  I hope you get to try it soon!

Supplies: Posies (1683) - Splendor, Candytuft (1676) - Splendor, Labels and Tags (1679) - Splendor, Pink Flora (1682) - Splendor
Other: Glimmer Mist - Tattered Angels, Alphabets - American Crafts, Bling - Want2Scrap; Die Templates -  Spellbinders, Cheery Lynn Designs

Julie Overby GCD Studios DT, 2012 GCD Studios Layout Gal

6.25.2012

Die Cut Week: Tags with Splendor

Title: Let's Tag it with Splendor Journaling Tags

Photobucket

Jouranling is very important to me. It is not often you will see a layout of mine that doesn't have some kind of
journaling on it. Today I want to share a layout with you that I created using the Splendor Collection.

Photobucket


Photobucket


Photobucket

Meet Janica...my crazy, funny and beautiful daughter!  She is always making funny faces...come to think of
it, I think it is a family thing cause we all do it.  Anyway...I want to do something different with my journaling, so I decided to break it up.  I cut out these labels and tags from the Splendor Collection and placed them throughout the layout.

Photobucket

Photobucket

Photobucket

I love the fact that this gives the eye a chance to move around the whole layout.  I am glad I could share with you a fun way to journal using GCD's Splendor Collection.  Thanks for stopping by today!

Supplies: Splendor Collection. Letter Tiles (#1680), Tiny Blossoms (#1685), Labels and Tags (#1679), Pink Flora (#1682), Zig Zag (#1687), Candytuft (#1676)


Photobucket

6.24.2012

Die Cut Week: Sentiments That Rock!

  
     Titling doesn't just need to be for layouts and mini albums, you can use it on your cards as well! Try thinking out of the box to make your titles take center stage in your cards.
I chose a fun quote from the movie, "Never Been Kissed," typed it into my Silhouette machine's software program using various fonts and then die cut it. To add some pizazz some of the words are the negagative, some words are applied to a banner strip and some words directly to the card.
 I love layers! Lots of it going on here. I layered a block of patterned paper, then fussy cut flowers and adhered them to the block of patterned paper. After that I trimmed strips of patterned paper and adhere those to the card, and finally layered the title to the card using foam tape to create some dimension.
I think that I am in love with this card. Splendor is a GORGEOUS line from GCD Studios. 
Another fun idea for incorporating titles into your cards would be to choose a sentiment, die cut the letters on patterned paper and then punch out and adhere to card. Ombre's are super HOT right now, and really make the title on your card sparkle!
Add some foam tape to some of the dots for some much needed dimension!
Thanks for stopping by! I hope that you're inspired to create some new cards featuring titling as your focal point.
Supplies: "Find Out Who You Are" Card: Splendor collection: Floral Frame (1677), Letter Tiles (1680), Posies (1683), Sunswept (1684) Other Supplies: White Cardstock (Bazzill). Corner rounder (Fiskars). Die cut machine (Silhouette America.
"You're the Best" Card: Flower Child collection: Wondering Geo (1638), Flowery (1641), Peacock (1646), Striking Swipe (1647). Other Supplies: White Cardstock (PTI).

6.23.2012

Triangle Week: Ombre/light to dark

So for my (Penny Smith) take on triangles this week, I decided to try to "weave" my triangles into a "chevron"/zig zag pattern. I think it turned out OK!
 (Let me know what you think. I like things simple... and cutting squares in half, was pretty simple!)


So to start, I had NO idea how many triangles I was going to need! But that is how I roll... eyeball and play!

So I cut 2 inch squares, and cut them in half. That's it! Now time to place them! Using one strip of adhesive (you may be able to see it in the picture...) just enough to place them, but not so much I couldn't get them up if I wanted to move them about!

I first envisioned two rows. But it wasn't looking quite right... so I kept going.
(I also started with 3 of each color, then decided on 2 more each.)

I decided that the tips of the triangles, where they overlapped, should overlap "every other" for more interest... does that make sense? Now keep in mind, I am no perfectionist. If I was, well, I don't think crafting would be my gig. So everything may not be 100% lined up. I'm good with that. It's how I roll.

So I decided, following the "designer" handbook, I went with 5 rows. (3's or 5's... no even numbers! LOL! Yeah. Right.) So after I placed all my triangles in a row (envisioning ducks all of a sudden) I decided to sew them down. Adding some linear interest?

All it needed now was some pictures and some embellishment. And there ya have it!
A blanket of triangles!

Oh YEAH!!!! Remember the "Ombre"?? Well, I used three GCD papers (see below) to make a progressively dark to light background. NOW there ya go! Triangles and Ombre! Ole!

Thanks for stopping by!

(Supplies: Country Charm: Farm Field Stripe #1506, Weekend Dun #1515; Bonjour!: Au Revior #1533; Storybook: Storybook Alphas #1743, Storybook Cards #1744)


6.22.2012

Triangle Week: Misting and pattern paper


It seems like electronic die cutting machines are “in” right now, and I have been using mine a lot lately.  Once technique I like to do it to use my machine to create shapes out of cardstock that I can use as masks for misting.


My photos on my layout are silly, and I was thinking of a fun, harlequin pattern of triangles to use as the base of my page. I designed my triangle pattern using Sure Cuts A Lot software.  Then I used my triangle mask and sprayed with two shades of mist; a bright orange and a bright blue.  The triangle shaped pieces of cardstock that were cut out of my mask I misted, too, and popped them up on the page in a few spots.


I also cut larger triangle shapes out of patterned paper in the same design and stitched circles in white thread around the paper triangle clusters. Some fun, striped accordion flowers help balance the sharp points of the triangles.


Next time you cut something out with your die cutting machine, be sure to save your “negatives” to use as masks for your next misting project!

Supplies:  
Papers-GCD Studios: Splendor “Labels & Tags” #1679, Splendor “SunSwept” #1684, Storybook “Cards” #1744, Bonjour “Nice” #1539, Bonjour “Bonjour” #1534, Oh Happy Day “Emily Rose” #1763, Oh Happy Day “Hailey” #1767, Sweet Tooth “Lollipop” #1557.  Mists-Tattered Angels, Studio Calico, Ranger.  Chipboard-Maya Road. Gemstones-The Paper Studio. Punches-Ek Success, American Crafts, Paper Studio, We R Memory Keepers.

Audrey Yeager GCD Studios DT, 2012 GCD Studios Layout Gal