5.11.2012

Mother's Day Week- Scrap your Mama

Hey, Julie here!  So very excited to share with you my first project for GCD Studios!  

Photobucket

Mother's Day is such a special time to me.  I'm blessed to be a Mom but I also have such an incredible Mother of my own.  It's hard to live far away from family and every year I write in my handmade Mother's Day card that I wish I was there to celebrate together.  Well, for the first time ever, I am back in my home town, and celebrating with her!  So, for this year I decided to do a layout in honor of my Mom.

Photobucket

Splendor:  noun brilliant or gorgeous appearance.

Seems fitting for these two lovely ladies in this photo!  Also, the gorgeous color palette in the Splendor Collection was perfect for this photo of my Mom and Grandmother. I decided to take a second piece of the Floral Frame paper and fussy cut this gorgeous bouquet.  Then I inked the edges and applied diamond glace to give it a shiny finish.

Photobucket

After it had dried, I used foam squares to adhere it straight over top the original image.

Photobucket

I wanted to incorporate some of the beautiful colors from this line so I used my Spellbinders die templates to create some embellishments.  After cutting/embossing these Edgeabilities, I adhered a strip of cream paper so it could peak through the openings.

Photobucket

I also layered some borders and fun shapes.  Before adhering the Bitty Blossoms, I added glitter and a pearl.

Photobucket

Lastly, I added my title and gushed in my journaling about amazingly awesome my Mom is and how blessed I am to have a Grandmother who gave her a great example to live by.

Supplies:  Floral Frame (1677) - Splendor, Heirloom (1678) - Splendor, Zig Zag (1687) - Splendor, Woven Chevron (1686) - Splendor, Letter Tiles (1680) - Splendor, Labels and Tags (1679) - Splendor, 

I hope you get a chance to journal about your Mom some time soon!

Julie Overby GCD Studios DT, 2012 GCD Studios Layout Gal

5.10.2012

Mother's Day Week - A Cute Paper Bracelet You have to try

My sisters are the recipients of many paper-crafted gifts, and although I know they love and appreciate them, I wonder if they sometimes wish for something different. When I was planning my sister's Mother's Day gift, I knew I wanted to make something special. So what did I finally come up with? This:


Not only is it something fun that she will enjoy wearing, but it is also perfectly suited to her. These colors are SO my sister. Would you like to know where I got such unique beads? You won't find them at a bead shop or in the jewelry crafting aisle. These beads are handmade from papers in the Flower Child collection!


To make your own beads, cut a long triangle from a sheet of patterned paper. The width of your triangle will be the width of your bead. My beads are about 1 inch wide. GCD Studios' papers are made of high quality cardstock that is just perfect for this technique.


Next begin rolling from the widest side of your paper strip.


When you have a good, tight curl, add a few inches of glue to the strip and continue rolling.


Keep rolling and adding glue until your strip is completely rolled.


To make the paper bead more resistant to wear and tear, seal the bead with a spray finish or Mod Podge. I used a decoupage finishing spray. The beads will not be waterproof, so my little niece won't be able to chew on this bracelet. However, the beads will hold up to most abuse.

If you're still looking for that special Mother's Day gift, turn your favorite patterned paper into beads and do a little jewelry-making. And be sure to roll enough beads for two because you are going to want to keep one!

Supplies used: Flowery Paper (1641) - Flower Child, Peacock Paper (1646) - Flower Child, Swirling Paper (1648) - Flower Child. Other: beading supplies, decoupage sealer, glue.


5.09.2012

Mother Day Week- Two beautiful cards

To celebrate all the moms out there (including my own wonderful mom and mother-in-law) I wanted to make some special cards just for them. 

Tracy Schultz GCD

I used the Botanique collection for my first card. I love the vintage style of this collection and kind of let that guide me. The leaves were cut using my Silhouette, and I layered them for extra dimension.

  Tracy Schultz GCD 

 And because my own mom is not someone who likes too much glamor, I kept the rest of the card really simple. Just some faux-stitching, a sentiment, and a little butterfly (which was cut from the Botanique collection, too).

Supplies Used: Cardstock- PTI vintage cream; Decorative Paper- GCD Studios Botanique #1715, #1707; Ink- Palette Noir, French Lilac; Accessories- paper piercer, Copic Multiliner black .3, Silhouette leaf_0117

Tracy Schultz GCD 

 On my second card, I wanted to do something a bit more homespun and fun. I used the Country Charm collection and made a little paper quilt out of some of my favourite patterns.

  Tracy Schultz GCD

 The strawberries were fussy-cut from one of the patterns and added just the touch I was looking for to finish my card off! 

Supplies Used: Cardstock- PTI white; Decorative Paper- GCD Studios Country Charm #1510, #1512, #1513, #1505, #1506; Stamps- Lawn Fawn Many Thanks, Verve Because of You; Ink- Palette Noir, Versamagic Red Magic; Accessories- oval nestabilities, clear gems, aqua ruffled ribbon

Tracy Schultz GCD Studios DT, 2012 GCD Studios Card Gal

5.08.2012

Mother's Day Week - What makes a hero?

Photobucket

It's my first post here at GCD Studios and I had the perfect assignment. "Why She is my hero". My mom is no ordinary mom and she does so much in one day .... that she might even fight crime at night time :) She spends countless hours on our family and teaches my siblings and I right from wrong. Her voice is amazing, she's beautiful and sweet, and she is the hero of the house. She always knows where everything is and is the first to help.

Journaling: This is my mom. She is my hero doing as much as she does in a single day, you would think she has super powers! I love my mom.

I decided to create this bracket frame and 2 simple clotheslines to hang up all the tags and photo. I found these mini clothespins at my local craft store and distressed them with my brown ink pad. Rub the ink pad lightly on them.  

Photobucket

I stuck to simple hand cut embellishments, to add cute little details. What do you think... do you like them?
Thanks for stopping by today. It means a lot to me.

Oh and PS... you can click on this photo of me and get to my new blog :)
Abbie Nichols GCD Studios DT, 2012 GCD Studios Teen Sponsor

5.07.2012

Mother's Day Week - A cute layout Sketch

Hi everyone, it's Pam here sharing my assignment about generations and a sketch to go along with my page. Scrapbooking the generations of the family in your life is so important. I always want to remember those special moments and documenting them on paper is just the perfect thing. For my assignment I created a page about a grandmother and a grandson (my mom and son). This photo was a sweet moment and I wanted share how much they mean to each other.


I used GCD Studios Sweet Tooth to complete my collection because the color suited the photos so well. I designed my page so each cut out heart would have a border around it with hanging banners. I am also sharing a sketch with you of my page in case you want to use this design. If you like, print out the sketch at full size and cut out heart shapes to make it easier to achieve this look. Don't forget to pair it with one of the pretty GCD paper collections.


Thanks for reading my post, have a great day!!

Pam Callaghan 2012 GCD Studios DT, Pam Callaghan 2012 GCD Studios Sketch Artist

5.06.2012

Mothers Day Week - Then & Now

Happy almost Mother's Day to all the moms out there! Today I'm sharing a "then and now" layout with you about my mom and me. I've always wanted to make a page like this so when Heidi was handing the assignments out I made sure I signed up for this one!

 I used an old photo of my mom and me when I was a few weeks old, as well as a more current photo.

For this page, I used my die cutting machine to cut a pattern of circles out of cream colored cardstock, then filled in some of the negative space with punched circles. I used patterned papers from Oh Happy Day, Splendor and Country Charm.

I really think it's true - you don't fully appreciate the hard work and sacrifice your own mother made for you you until you become a mom yourself. I hope you'll document this on one of your own pages soon! Happy mom's day :)

Jennifer Chapin 2012 GCD Studios DT, Jennifer Chapin 2012 GCD Studios Layout Gal

5.05.2012

Sweet Tooth Week : An early jump on Mother's Day :)

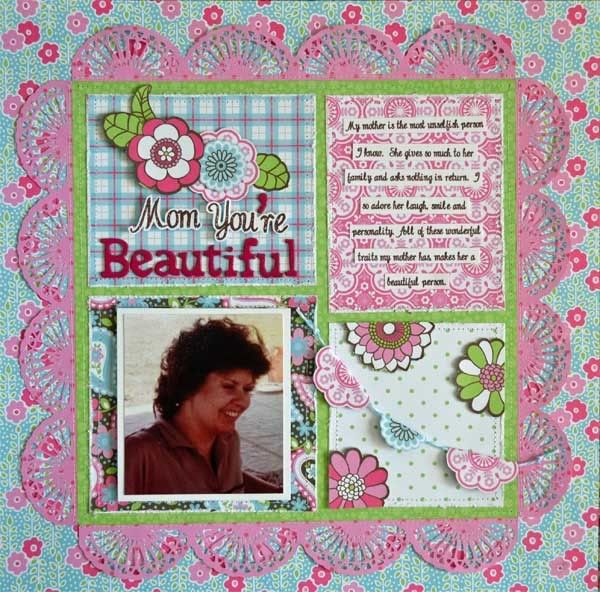
Hey...Guiseppa here! I am so excited to working with GCD studios and I can't think of a better way to start off my term than with a layout of my Mother using the Sweet Tooth Collection.


My Mother has always been a fan of my scrapbooking; always wanting to see my latest projects and buying all the magazines that I get published in. This women rocks! Now it is time to honor her and what better way than to have her beautiful face on the GCD Studios Blog. I love making my momma proud.


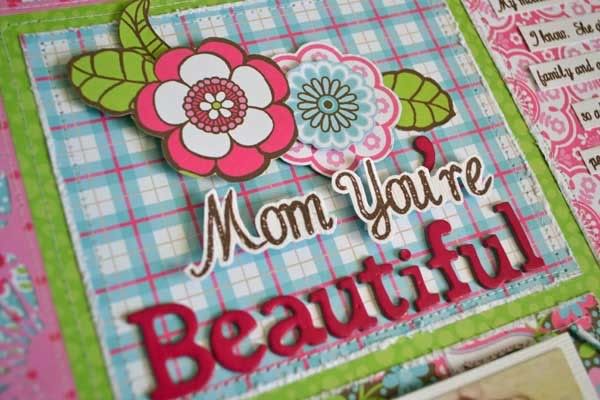
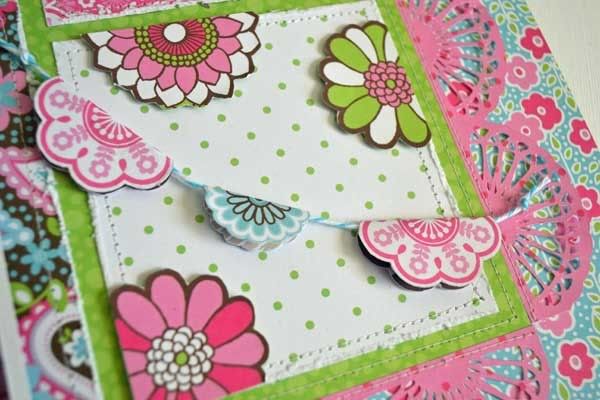
 I love fussy cutting and using foam adhesive to add more dimension and interest in my projects and that is what I did here with the flowers and title.


I hand cut flowers from the Cherry Cordial, Sour Cherry and Lollipop papers. I made this cute little banner by folding the flowers in half and stringing twine in between the folds. The boarder around the layout was made using my Silhouette machine and stitched on. I did a lot of machine stitching in this layout because my it reminds me of how my mother spent many long hours making clothes for my sisters and I.

Supplies: GCD Studios Sweet Tooth Paper Collection, Vanilla Shake (1563), Lollipop (1557), Sprinkles (1560), Gum Drop (1554), Cherry Cordial (1553), Peppermint Plaid (1558), Sour Cherry (1559). Other Supplies: Silhouette (lace border) and American Crafts (foam adhesive and letters)


5.04.2012

Sweet Tooth Week- Craft Room Decor.

Amanda here with you today and I have a little story to tell.  It pulls us away from our families (at times), makes us spend money we don't have, and no matter how good it makes us feel, we always need to do just...one...more.  We do it alone or with friends, and sometimes we even do it at parties.  I have even been known to sneak some into my suitcase before a trip.  And sometimes the really good stuff comes from across the border.  No, not drugs silly!  Crafts! 

A few years ago my sister made a cross stitch that said "Do crafts not drugs" and I have loved the saying ever since!   And for those of you who craft, you know that crafting IS like a drug.  As an aficionado of sarcasm, I thought a wall hanging with this saying would be a perfect fit for my craft room.


Wanna know a secret?  This frame is regular ol' white stretched canvas turned around backward!  Not only was it less expensive than a traditional frame, but the burlap was already there.   I cut strips of paper from the Sweet Tooth collection and Mod Podged them to the edges of canvas to cover up the exposed staples and rough edges.


To make the flowers for the corner bouquets, I fussy cut (a gazillion) flowers from the Sweet Tooth collection and layered them with foam squares.  To make the spiral tendrils, I wrapped narrow strips of paper around a wooden dowel, securing the ends with tape, and lightly spritzed them with water.  After the paper strips were dry, I unwound the spirals and gently stretched them out. 


I die cut the letters, adhered them with foam, and embellished each letter in the word 'crafts' using a variety of tried-and-true paper crafting techniques: twine wrapping, distressing, a button trio, a flower with rhinestone, a tag tied with jute twine, and a pearl embellished butterfly.  

Now move along before you start to suffer from crafty withdrawal! 

Supplies: From the Sweet Tooth collection: Sour Cherry Paper (1559), Sprinkles Paper (1560), Sweet Tart Paper (1562), Sugar Cookie Paper (1561), Chocolate Kisses Paper (1554); The Twinery baker's twine (Pink Sorbet), May Arts jute twine (SM09), Martha Stewart butterfly punch, KaiserCraft adhesive pearls, Sierra Pacific Crafts stretched canvas, Echo Park rhinestone brad, Avery mini tag, buttons (unknown)

5.03.2012

Sweet Tooth Week - Wedding flowers

Hello my name is Penny Smith and this is my FIRST assignment with the GCD Team!!

Being one of the "Layout Girls", (it fits. I rarely do anything but!) it was exciting to get going on my first one!

Let me tell you how exciting it was to go through the fantastic papers! Piles of loveliness!
Sweet Tooth is a fantastically bold, wonderfully bright collection!

I have a small photography business, and I did my FIRST wedding last year! It was a fantastic affair for me-because even thought it was a small town (but simply beautiful) event, I did a little overkill and took almost 2000 pictures. I don't think my camera ever stopped clickin'! So I take pride in the event and one of my favorite pictures (and theirs too, as it turns out) popped RIGHT into my head when I saw this collection! (I edited the picture so that the only color retained was the flowers.)

Photobucket
Who needs embellishment! I kept it relatively simple, and used the paper as embellishment! The flowers on the paper were BEGGING to be center stage!

(Shhhh!!! I "borrowed" the butterflies from the Bonjour! collection!)

A couple of things I did to make the flowers and butterflies more dimensional: First, I attached everything with the Tiny Attacher staples (Tim Holtz). So instead of them being flattered down to the layout, they lift up here and there. Second, I got out a butterfly punch, and used it as a layer under my cut out butterflies from the paper! I love dimension! And this was an easy way to do it!


(Supplies: Sweet Tooth: Sugar Cookie (#1561) stripes, Sour Cherry (#1559) floral, Bonjour!: Butterfly Flutter (#1536) ) 

So thanks for stopping by! I am thrilled to be a part of this team and to be able to create with these wonderful collections! So much inspiration available to you all each month on the blog! So stop by often!!


5.02.2012

May Issue of The PaperCut + Sweet Tooth GiveAway.

As promised...here it is...the next issue of The PaperCut.
It has more pages and more projects to inspire you. we hope that you enjoy it.


Make sure to check out the wheelbarrow template we posted earlier today, because it's adorable. Thanks to Heidi Van Laar. We just love her and how talented she is. Also make sure you checkout are" news portion" on page 2. We would love for you to submit your GCD projects and they might end up in next month's magazine.

On page 11 & 12 you can read more about the cover and what influenced our decision to use this photo.

Photobucket Now share what you think and you will be entered into a chance to win the Sweet Tooth collection. It's our collection of the month, theme of this week and the focus of the magazine. So there is a lot to get you drooling over "how to use it", from all our many projects made with it.

You have until May 6th (Sunday) to leave a comment, to be entered into the give away. I can't wait to read what you all think and we see you tomorrow with another amazing project from Sweet Tooth.

Heidi Sonboul GCD Studios Design Team Coordinator, Heidi Sonboul GCD Studios Design Team Coordinator

Sweet Tooth Week- Wheelbarrows and flowers, oh my!

Spring is probably my favorite season, and the thing I love the most about it is the sense of life coming back after a long cold winter. The sun starts to shine, the birds start to sing and all the flowers start to poke their little heads out of the ground. Ah, the flowers that is probably the best part of all! Bright happy spots of color that announce that warmer weather is on the way. Which brings me to the card I created with the Sweet Tooth collection.

To me this is spring, a wheelbarrow full of flowers waiting to be planted.
 
 Supplies:
Cardstock: (white) Georgia Pacific, Patterned Paper: (Cherry CordialChocolate Kisses, Lollipop, Sour Cherry, Sugar Cookie from the Sweet Tooth Collection) GCD Studio, Stamp: Paper Smooches, Ink: Clearsnap, Twine: Pink Paislee
Size: 5.5"x5"

The Sweet Tooth collection was perfect for this project, the colors are both bright and soft, just like spring flowers! 


 To make this card I started with a template of a wheel barrow that I created. I cute the base shape from cardstock and then cut the different pieces from the patterned paper. The flowers were cut from different patterned paper and added to the top. The whole thing is finished of with a sign, I stamped and added to a little wooden post created from a craft pick.

And because I want you to be able to create your own wheelbarrow card here is the template I created.


(Right click to save the image)

 Have a Happy Spring!

5.01.2012

Sweet Tooth Week- The Funny Things They Say

Having an almost-3-year-old in the house provides for daily entertainment (both in the comedy and drama departments).  My daughter's vocabulary is pretty good, but sometimes she just doesn't get the words right.  My husband and I have fun around here trying to figure out some of the strange words, and when we do, we seem to start using them ourselves!  I created this page about some of my favorite funny things that she says: Pams-shoo and Pail-nolish (shampoo and nailpolish).


When I started this page, since the photos were of different events in different settings, I needed to bring them together somehow.  I started thinking about "shampoo" and baths, so I decided to use the blue paper in the Sweet Tooth collection to represent bubbles.  And when I think of nailpolish, I think of girly things and pink, so the floral papers in this line were perfect, too!  I combined both of these elements inspired by my photos (circles and flowers) to create the basis of my page.


I cut the letters and ampersand on my Cricut and stitched through them with some pink thread.  A little fussy cutting of of some of the diamond patterned paper and the flowers, and I created a fun and memorable page.


Supplies: all papers from Sweet Tooth Collection- Bubble Gum (1552), Cherry Cordial (1553), Gum Drop (1555), Sprinkles (1560), Sugar Cookie (1561), Sweet Tart (1562).  Other: Die Cutting Machine (Cricut), Stickles (Ranger), Smooch Inks (Clearsnap).


I am so excited to be sharing my first post for the GCD Studios blog  and thanks for stopping by. Now do you have any favorite things your kiddos or grandkids say?  Leave a comment...I would love to hear about them!


Audrey Yeager GCD Studios DT, 2012 GCD Studios Layout Gal