4.19.2013

Pattern Paper Into Embellishments

Spring has FINALLY arrived!  It's been a relentless winter here in central NY state!

Nothing helps get you into an springtime mood better than some springy papers and some cute photos!  These are my kiddos on Easter Sunday, which happened to be a decent day.  I challenged myself to use a LOT of patterned paper on this page because there were so many pretty springy prints and a great mix of tone on tone and patterns.  I think I have TEN different patterns on here!  :)
Of course I had to fussy cut out some flowers and I added some Glitter Epoxy dots to the center.  The leaves I cut with my Cricut.
On my alphas, I wanted them to be a tiny bit more blue, so I went over them lightly with a blue ink pad.  The heart I die cut on my machine, too.
I love having lots of layers, and these square brads and the paperclips add just the right finishing touches!
Hope you are enjoying your spring!

-Audrey Yeager

Supplies:
Nostalgia Patterned Papers: Romantic Garden (#1985), Evening Field (#1986), Nostalgic Plaid, Red (#1987), Flourish in Blue (#1988), Nostalgic Cutouts (#1992), Nostalgic Plaid, Blue (#1996)

Pure Bliss Brads (#2034)
Pure Bliss Paper Clips (#2035)
Kathy Davis Happiness Glitter Epoxy Dots (#1868)
Family Jeans Chipboard Alphas (#2090) Audrey Yeager Badge photo 2013-DT-Badge-Audrey-Yeager_zps1a6cde23.jpg

4.18.2013

A Darling Side Table Project

Hi everyone!  Amanda here today with a pretty altered frame that is perfect for spring.  


I started with a brown, foldable frame that you can find in just about any craft store.  I love the yellows and pinks in the Nostalgia collection and chose to use only those colors for this frame.  After I painted the edges with a soft white, I cut and adhered the plaid paper to each side of the frame. 


The live, laugh, love journaling card sentiment was a perfect fit for this frame.  Wanna know a crafty secret?  I rarely use Mod Podge for the types of projects.  A good, permanent tape runner does the trick just fine.  


I die cut roses and leaves and adhered them to the corners of the frame.  I gently turned back the petals of the flowers to help them bloom.  


I repeated the bouquet of roses on the other side to balance the frame.  Be sure to check out the entire Nostalgia collection because it also has a blue and green plaid that would be perfect for boy projects, too.  

Have a great day! 

Supplies: From the Nostalgia Collection: Nostalgic Plaid, Red 1987, Nostalgic Plaid Blue 1996, Flourish in Red 1993, Floral TIle 1989, Nostalgic Cutouts 1992

4.17.2013

Using Tags and Label Sheets

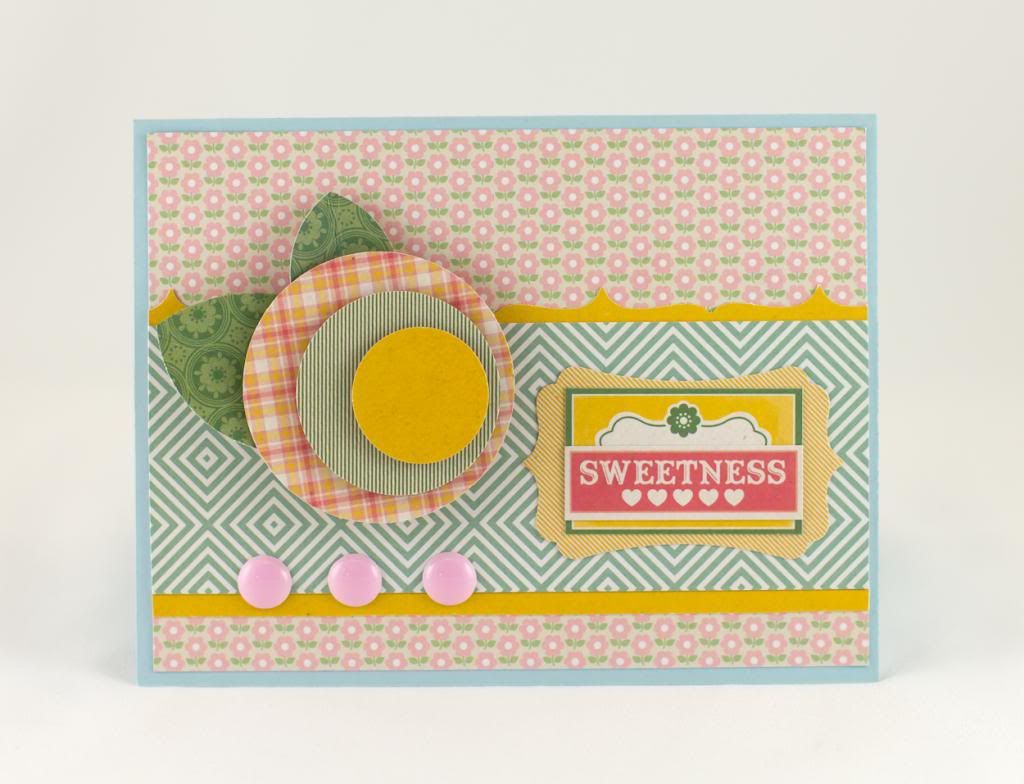
Hello everyone! Nina here today to share a card made with Nostalgia collection.


Supplies: All paper from Nostalgia 6x6 pad #1998; adhesive pearls from Ambrosia collection #1886.

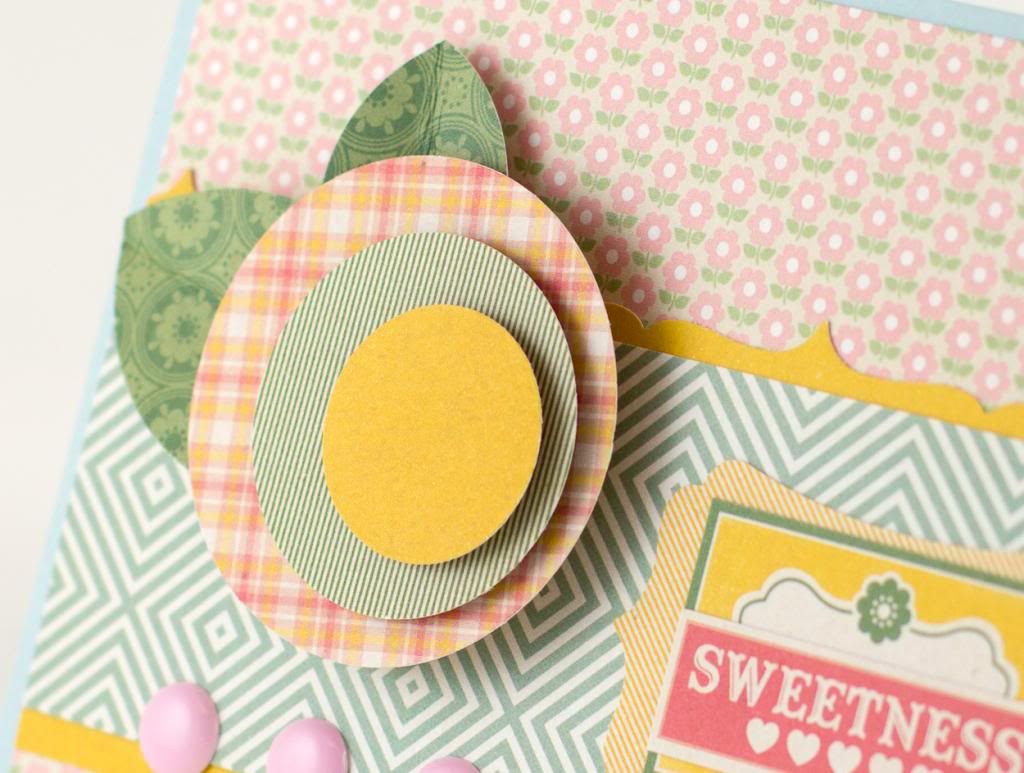
One of the easiest ways to create your own 3D embellishments is to punch circles from patterned paper and stacked them together with foam adhesive.

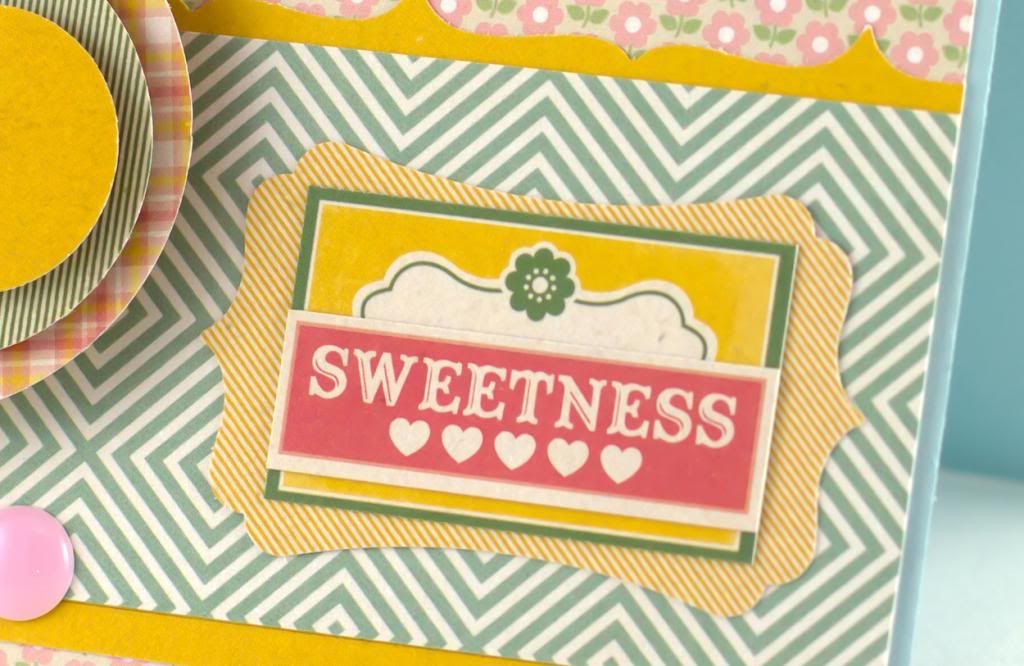
The label sheet is also scaled down for the 6x6 pad. 


Thank you for stopping by! Happy Crafting!


4.16.2013

It's Spring Time at GCD

Hi GCD Studio fans! Katrina here, with my first post as a design team member. I am so excited to share my layout with you today.

I worked with the Nostalgia collection and immediately fell in love with it.  The soft color palette works great for springtime pictures.

 photo K_Hunt1stSignofSpring600.jpg

I added some of the Glitter Epoxy Dots from the Happiness collection as an accent to my corner. 

 photo K_Hunt1stSignofSpringDots600.jpg

You can see here that in my picture collage I popped a few of the pictures up for dimension and a different look than just a flat collage.

  photo K_Hunt1stSignofSpringTag600.jpg

I love the text chipboard alphas and I used one of the Glitter Epoxy Dots to dot my "i".  

 photo K_Hunt1stSignofSpringTitle600.jpg 

Get out those cameras and take some springtime pictures.  The Nostalgia collection is the perfect choice to scrap them with.  Thanks for stopping by today.  

Supplies:
Nostalgia Collection-Paper #1989, #1990, #1991, #1992, #1995, #1996
Happiness Collection-Glitter Epoxy Dots-#1868
Fun & Funky Collection-Chipboard Alphas-#2106

Other Supplies-Punch, Cardstock, Stapler, Silhouette Cameo, Ink, Sharpie pen


Katrina Hunt Badge photo 2013-DT-Badge-Katrina-Hunt_zpsd476cc72.jpg

4.15.2013

Blooming Everyday

Hello everyone! I'm Christina and I'm so excited to be here! I'd like to share a layout I've made using the Nostalgia collection. I just adore these papers. The colors are so vibrant, happy, and bright. This layout is 'blooming' with fun! Flowers are the perfect accent to any project. I really wanted flowers to be the center piece of my layout.
 photo gcdDTbloomingeverday1christinacollins_zpse9b9d2b7.jpg

My daughter is growing everyday, much like a flower. I love the little girl she is blossoming into. That's what this layout is all about!
 photo gcdDTbloomingeverday3christinacollins_zpsa546754f.png
I cut these gorgeous 3d flowers out with my Silhouette Cameo. The papers in this collection are absolutely perfect for making realistic looking flowers. The patterns work so well! I made a visual triangle around the photo using the flowers.
 photo gcdDTbloomingeverday2christinacollins_zps4e4687bf.png 
Supplies:
Paper - (Nostalgia) - Olivia, Nostalgic Plaid (Blue and Red), Romantic Garden, Flourish in Blue, Hash Marks, Nostalgic Cutouts, Floral Tile
(Charleston)- Anna
Cardstock - Colorbok - White
Other - Silhouette Cameo - Love Always Wins Stamps by Ali Edwards - Kathy Davis Glitter Epoxy Dots

Thanks for reading!

  photo 2013-DT-Badge-Christina-Collins_zpsac819b58.jpg

4.14.2013

One Charming Wreath

Amanda here today just popping by to share one of my projects that debuted at CHA in January.  I love making paper leaf wreaths.  They are super easy, but they look amazing.  In a few quick steps you can make your very own paper leaf wreath, too.

I used the newly released Charleston collection for the leaves on this wreath.  These colors are perfect for almost any season. 

1. Cut a wreath form from cardboard.  I use my Martha Stewart circle cutter to score the cardboard and then I finish cutting with a craft knife.   You can vary the dimensions of the circles to customize the size of your wreath.  This is so easy you will never by an expensive foam wreath form again.

2. Die cut a bunch of leaves from patterned paper (I used approx. 70 3.5" leaves for my wreath).  Crease the leaves down the center, fold the ends in and staple to the wreath form. 

3. Continue stapling leaves around the wreath form until both ends meet. 
Add a pretty bow and you're done!  Now you have a piece of decor that is sure to impress!

Supplies: Charleston collection; 1.5" ivory satin ribbon (Offray); leaf die (Silhouette)


4.13.2013

Hello Sunshine

Hi everyone!  Tegan here today!   I don't know about you, but I am definitely ready for summer!  Working with the Sunkissed collection was a great way to chase away the winter blues~ or any blues for that matter!  The color palette is fresh and fun and will certainly transport you to a tropical wonderland anytime you wish!  The paper reminds me of a happy sunny day so I decided to make a mini album about something that makes me happy~ bike riding!


And I can't leave you without showing you the inside pages too!


Now, didn't that just brighten your day?!  ;)


Supplies:  Sunkissed Collection- Calendar Girl (2066), Pool Party Baby! (2063), Weekend Adventures (2062), Tickled with Sunshine (2065)


Tegan Skwiat GCD Studios DT, 2012 GCD Studios Layout Gal

4.12.2013

Lovely Cards with Amanda

Amanda here today with a couple of pretty cards that were on display at CHA earlier this year.  I used GCD Studios new Pure Bliss collection which is chock-full of trendy patterns in fresh colors. 


I placed the library card print behind a die cut heart.  I opted for faux stitching for this card because, for the life of me, I cannot sew around a curve on paper.


My favorite print (and maybe yours, too)  in the entire collection is the embroidery hoop print.  These little hoops were just screaming to be fussy cut!


I used the same houndstooth print and sentiment, this time with die cut feathers, to create a coordinating card.  Since there were no curves I ran this card through the sewing machine.   See that little blurb of stitches on the left?  It's my new favorite DIY embellishment. 


I love the brown/gray opposite the pink.  Combined with patterned die cut feathers, this card is super fun and trendy! 

Always glad to have you here! 

Supplies: Pure Bliss collection; ivory twine (May Arts); feathers die (Lifestyle Crafts)


4.11.2013

Happy Tenth

I don't know about you, but the George paper from Special Delivery seemed like a great big splash of summer to me, so I had a ton of fun making a project with it in the middle of winter!


Love the adorable flowers, and the sweet typewriter-esque letters from Spencer...


A few punched out circles from the patterned paper provide a quick scalloped edge for the image! :)

Thanks so much for stopping in today!


Blog: http://bearydocardsinc.blogspot.com/


4.10.2013

A Beach Bag Card You'll LOVE!

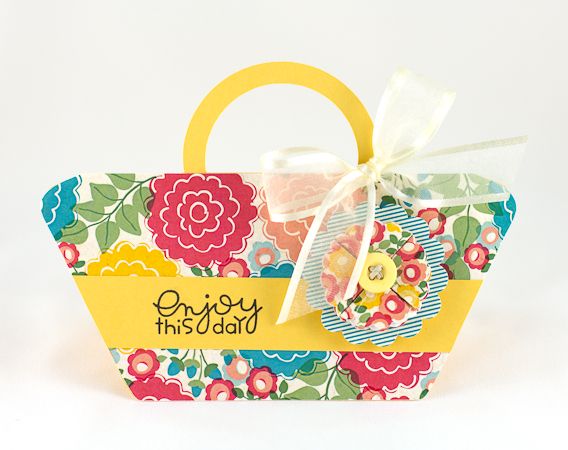
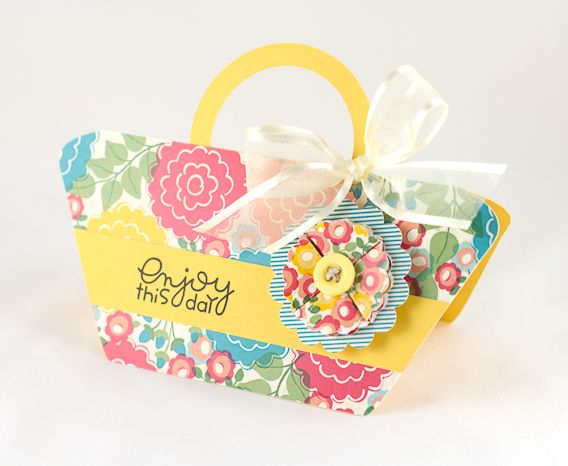
Hello everyone! Nina here to share my CHA project using the Nostalgia collection. The bright and happy colors and patterns remind me of lazy summer days so I made a beach bag shaped card:


Supplies: All paper from Nostalgia collection. Romantic Garden paper #1985; Flourish in Red paper #1993; Nostalgic Cutouts paper #1992.

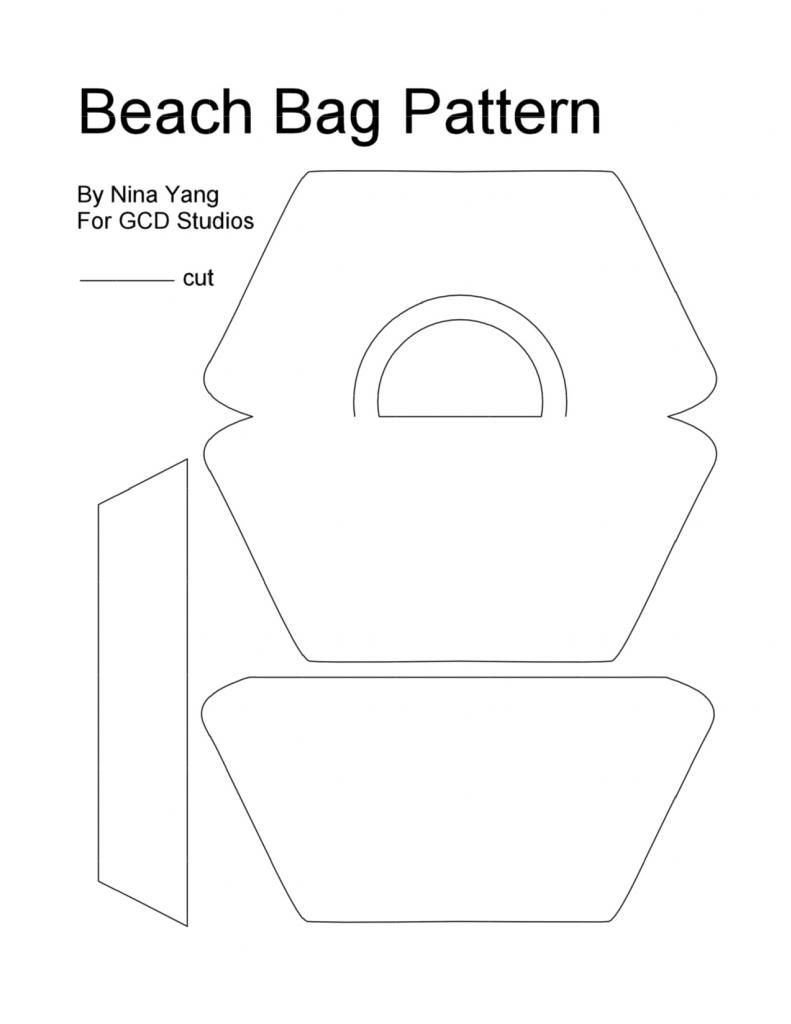
You can download the patterns at the end of this post. The focal flower were made by layering double-folded scalloped circles together.


Thank you for stopping by! Happy Crafting!
Nina Yang GCD Studios DT, 2012 GCD Studios Card Gal