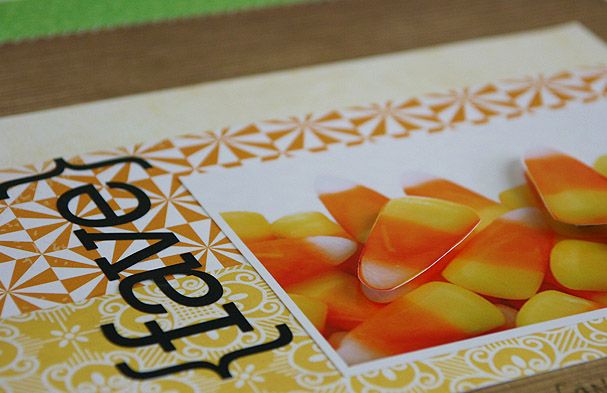
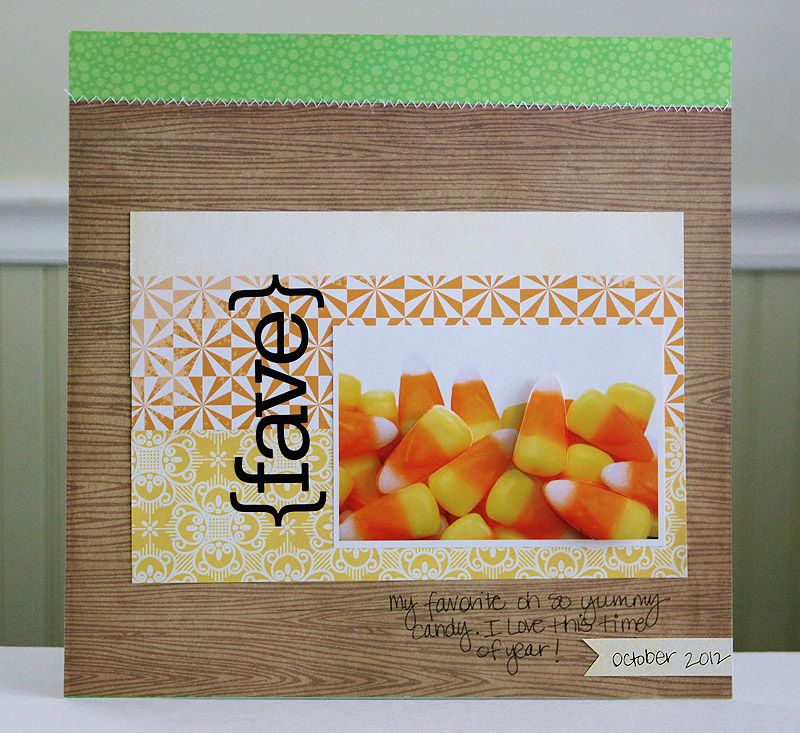
I'm not a big candy fan. Well, 11 months out of the year that is. Once October comes, it's a different story. As soon as I see those bags of yummy striped corn goodness, I have to indulge just a little. Well, maybe a lot!
Candy corn, oh how I love thee!
To make the candy corn stand out just a bit, I printed two photos, then cut out a few pieces of the candy from one photo and used foam tape for dimension.
Supplies Used: #1680 Letter Tiles, 1679 Labels & Tags, 1684 Sunswept, 1766 Chloe, alpha letters, machine stitching.
10.17.2012
10.16.2012
I've Got My Eye On You
Hello everyone..
It's my most FAVORITE time of the year.. Halloween!!! I love everything spooky, I love being scared, and I love to dress up.
Today on the blog, we are focusing on Halloween layouts and I am highlighting spooky eyes. A couple of years ago, my son found this amazing eyeball hat. There was no costume to go with it, but he really wanted this hat. So I had to get creative for the costume. We took the colors from the eyeballs and cut out fabric to coordinate and then created "eyeballs" in his tshirt, and I sewed them into the fabric. Next, we used makeup to accent his eyes with the same colors. I knew I had to use these photos for my page.
Here is the layout that I created for the Eyes theme:
For some direction some triangles and sewed a single straight white line to create an effect of a hanging spider web:
Then for the eyeballs, I punched out circle layers and recreated the colors and layers of the eyeballs. I added some craft store "eyeballs" in the center:
And added some white mist of the black cardstock to make it pop:
My kids LOVE the craft store eyeballs and are always wanting to use them, so throw them on a page and make it "spooky".
Happy Halloween!!!!!!
Supplies: "Chalkboard" Storybook, "Chloe" "Hailey" "Mariah" Oh Happy Day line, "Sour Cherry" Sweet Tooth.
Other: cardstock, mist, bling, sharpie pen, sewing machine stitching, and Paste On Eyes from the craft Store.
It's my most FAVORITE time of the year.. Halloween!!! I love everything spooky, I love being scared, and I love to dress up.
Today on the blog, we are focusing on Halloween layouts and I am highlighting spooky eyes. A couple of years ago, my son found this amazing eyeball hat. There was no costume to go with it, but he really wanted this hat. So I had to get creative for the costume. We took the colors from the eyeballs and cut out fabric to coordinate and then created "eyeballs" in his tshirt, and I sewed them into the fabric. Next, we used makeup to accent his eyes with the same colors. I knew I had to use these photos for my page.
Here is the layout that I created for the Eyes theme:
And added some white mist of the black cardstock to make it pop:
My kids LOVE the craft store eyeballs and are always wanting to use them, so throw them on a page and make it "spooky".
Happy Halloween!!!!!!
Supplies: "Chalkboard" Storybook, "Chloe" "Hailey" "Mariah" Oh Happy Day line, "Sour Cherry" Sweet Tooth.
Other: cardstock, mist, bling, sharpie pen, sewing machine stitching, and Paste On Eyes from the craft Store.
10.15.2012
OCT/NOV Issue Of The PaperCut + A Giveaway
Happy Fall EVERYONE!
I'm excited to finally share this months issue,
that's filled with fun and festive ideas.
Now that you have looked through the issue.
Leave a comment and you have two chances to win
this charming kit.
Winner will be picked next Monday.
Simply leave a comment letting me know what you loved best
about this months issue.
10.14.2012
Interactive Card
Here, my little ghost friend is hiding a tag that reveals a fun Halloween sentiment.
To make my tag stand out, I made it out of different colored paper. Then made it pop by adding black ribbon along with a button and twine to the top.
Here's the little tag starting to get pulled out from behind the ghost.
To make sure it fits snugly behind the ghost- simply use dimensionals to adhere the ghost to the card front. But position the dimensionals so that they form a "track" for the tag to slide into.
And here is the tag when it's pulled out of the card. It reveals a fun little Halloween sentiment.
[Supplies: GCD Studios Flower Child #1642, Splendor #1678 Stamps- Whimsie Doodles Halloween Tag Ghost, Prickley Pear By the Pricking; Ink- Memento Tuxedo Black; Copics- B00, N1; Accessories- CSS Tags1 die cut, paper piercer, Copic Multiliner Gray .3, Creative Impressions black glimmer ribbon, orange button, Divine Twine black licorice, Copic Spica black glitter pen]
Another fun way to get your recipient involved is to make a slider card.
Here, I made a slider that moves the witch along a path right behind a spooky house and reveals a fun, hidden sentiment in the process.
I cut all of the shapes out using my Silhouette. The slider window itself was done using a die-cut. Then it was just a matter of assembling the entire card and stamping my sentiment!
Before I adhered the yellow striped paper to my cardbase, I stamped the sentiment where it would be revealed by the slider.
Then I added the yellow striped paper, haunted house, and pumpkin to my card using dimensionals. I used a glue dot to adhere the witch to the slider element itself.
Here you can see the slider in action- the recipient simply pulls on the tab to guide the witch along her path. And reveals the fun sentiment, too!
10.12.2012
October Birthday Cards
Hey there friends! So, it's the beginning of my favorite time of year-the holiday season, starting with Halloween! I'm going to share with ya some cards that not only celebrate this festive holiday, but are also birthday cards using non-Halloween product!! A paper-crafting card maker needs to know how to st-reee-tch your product, and GCD Studios has SO many great papers that you can create for any holiday with!
This card is super simple and easy to create with papers from my favorite collection, Splendor. Mix some paper, stamps and a little ribbon and you have a fun birthday card for any Halloween baby with one of the most popular Halloween motif ever; pumpkins!
I stamped the pumpkins on Labels and Tags paper, added a cute sentiment that mixes Birthday and Halloween fun. Finally, adding a little ribbon trim gave the card some dimension and texture.
This next card is more elegant take on a favorite color combo of orange and black. Again, I turned to my favorite collection from GCD Studios; Splendor for inspiration.
I cut some strips from Navy Flora and Sunswept, notched them and used them to create a background.
Then I added some fun and bright orange trim and some cardstock numbers as a play on the typical Halloween sentiment. It didn't occur to me till after the fact that this card could also work perfectly for someone who is ACTUALLY turning 31!
Well, that's it for me today! Check the blog for more amazing ideas and projects all month long!
Supplies:
"Halloween Wishes" Card: Splendor collection: Labels and Tags (1679), Zig Zag (1687) Other Supplies: Sentiment (Papertrey Ink). Dye Ink (Tsukineko). Alpha stickers (Lilybee). Black and white striped trim.
10.11.2012
Candy Corn Anyone?
Today I'm sharing a cute and simple Halloween card with you that would be easy to make with your die-cutting machine. I started by using plain cardstock to make my candy corn shape, then added a speech bubble with the Letter Tiles paper from the Splendor collection.
Finish the card off with a few strips of patterned paper and stamped phrase and you're done! Thanks for stopping by today and Happy Halloween!
10.10.2012
A Cute Haunted House + Template
Hi there!
Today I have another shaped card to share, and since Halloween is just around the corner, I thought I'd make a fun haunted house.
Supplies:
Cardstock: (black) The Paper Co., (orange) Bazzill, Patterned Paper: (Layered Geo, Peacock from the Flower Child collection, Sour Cherry from the Sweet Tooth collection) GCD Studios, Adhesive dot: Pebbles Inc., Foam Tape: Scotch
Size: 4.25"x5.5"
Instead of sticking with the standard dark and creepy color palette, I decided to go with bright and funky. I think it makes it sort of different and fun.
Since this was a pattern I created myself, I thought I'd share it with you, then you can make your own bright and funky haunted house...or maybe you prefer the classic creepy colors. I do think this could look pretty cool all done in black with just the windows and moon in yellow.
Happy haunting everyone!
Today I have another shaped card to share, and since Halloween is just around the corner, I thought I'd make a fun haunted house.
Supplies:
Cardstock: (black) The Paper Co., (orange) Bazzill, Patterned Paper: (Layered Geo, Peacock from the Flower Child collection, Sour Cherry from the Sweet Tooth collection) GCD Studios, Adhesive dot: Pebbles Inc., Foam Tape: Scotch
Size: 4.25"x5.5"
Instead of sticking with the standard dark and creepy color palette, I decided to go with bright and funky. I think it makes it sort of different and fun.
Since this was a pattern I created myself, I thought I'd share it with you, then you can make your own bright and funky haunted house...or maybe you prefer the classic creepy colors. I do think this could look pretty cool all done in black with just the windows and moon in yellow.
Happy haunting everyone!
10.08.2012
I Put A Spell On You
Hello everyone! It's Tegan here again. Today I am super excited because I get to share some Halloween goodness with you~ I absolutely LOVE Halloween! And since I love handing out Halloween treats to my friends and family, these little potion bottle treasures are perfect! You could also just use them as decorations. But just a warning- your family will want to eat all of the candy out of the bottles because they are so cute!
Which one is your favorite? I can't decide!
The Labels & Tags paper from the Splendor collection has some great labels and such for making these potion bottles. And Halloween is still a few weeks away~ you have plenty of time to make some for yourself! I recently found the bottles in the glass section of my local craft store.
GCD Supplies~
Flower Child: Striking Stripe (1647)
Sweet Tooth: Peppermint Plaid (1558)
Splendor: Labels & Tags (1679)
Country Charm: Super Star (1511), Cherry Pie (1554)
Oh Happy Day: Chloe (1766), Priscila (1968), Amber's Avenue (1774)
Storybook: Chalkboard (1737)
10.07.2012
Treats for the School Chums
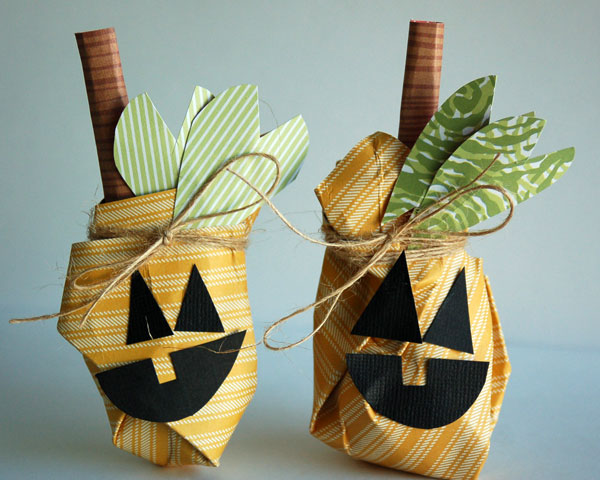
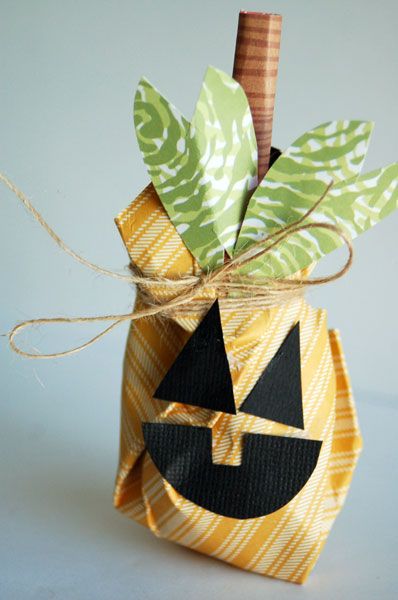
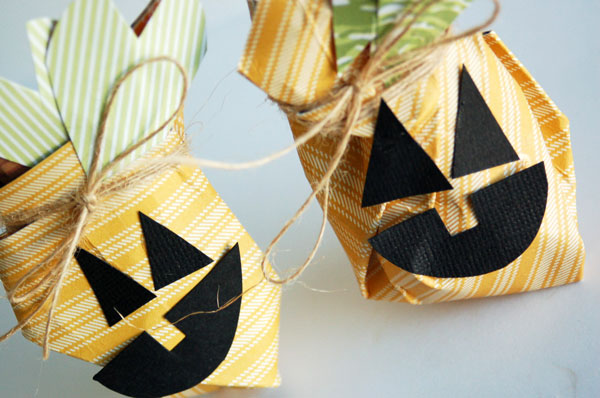
Here's a spooky yet fun treat for the kids to take to school and hand out to all the other little goblins and ghouls on Halloween: lollipops disguised as jack-o-lanterns.

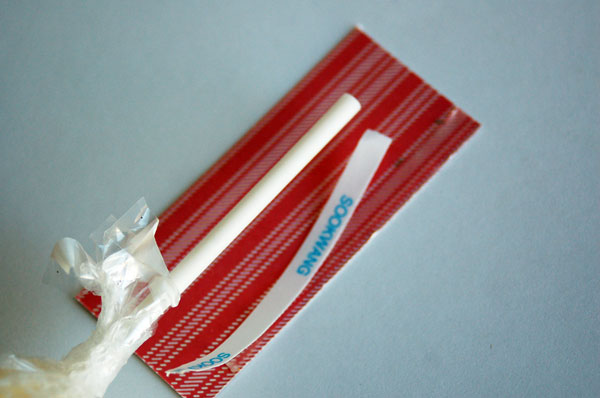
To make these spookalicious little guys, you are going to need:

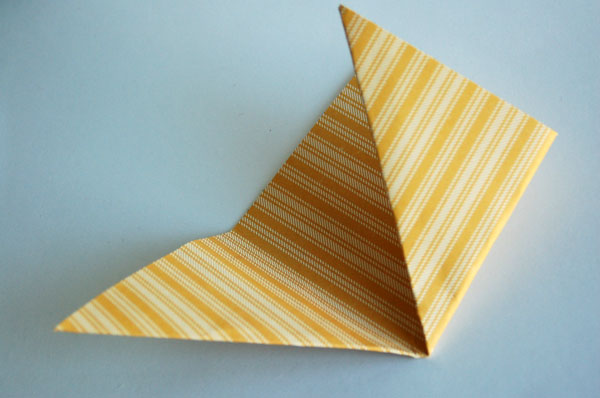
Fold it again and again.

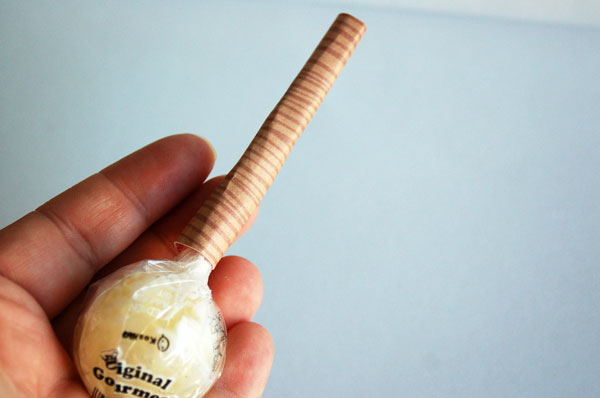
Unfold it. Set it aside. Wrap a piece of brown paper around the lollipop's stick. (Note: I used a piece of two-way tape to hold it down.)


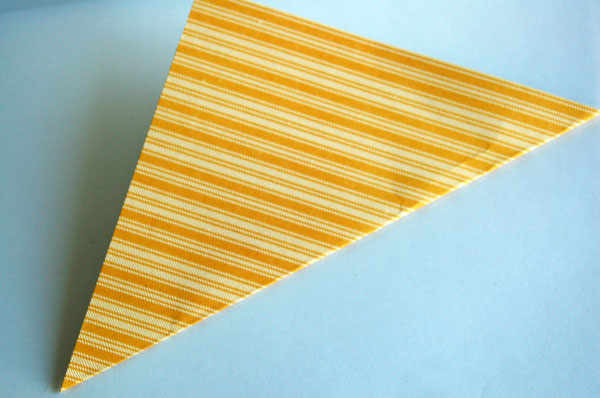
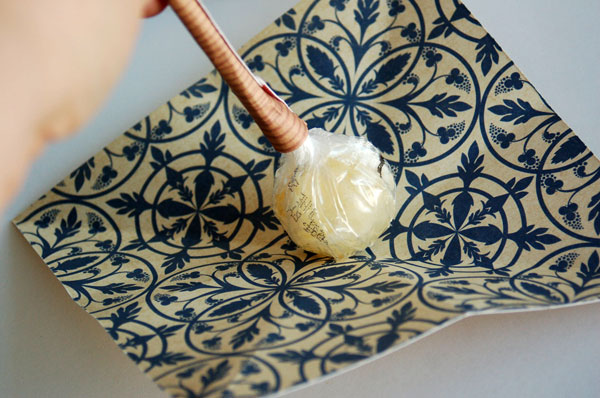
Set the lollipop on your piece of patterned paper.

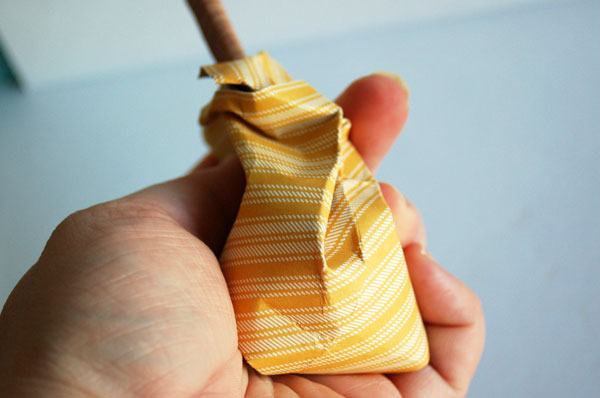
Fold the paper up, crinkling it as you go. Make sure it fully covers the lollipop.

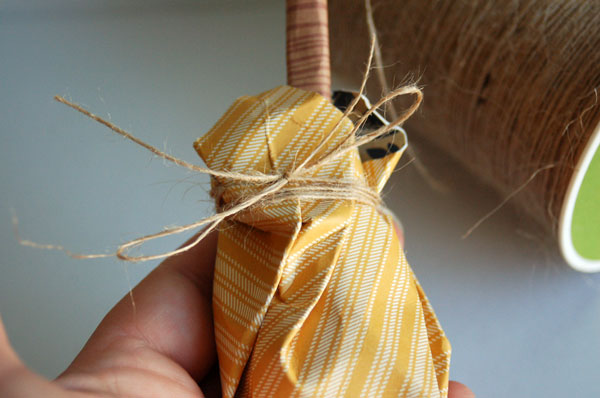
Tie a piece of jute or string around the crumbled paper panel. Be sure to finish it with a pretty bow.

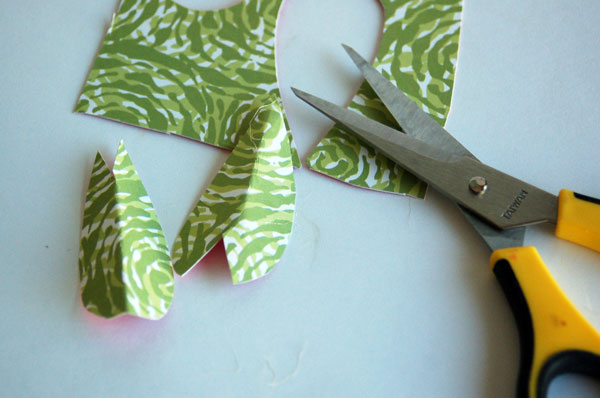
Set it aside and cut two leaves from green patterned paper. These don't have to be pretty. Just imagine you are cutting a rain drop. Once you've cut two of them, snip a triangle out of one end.

Place the leaves on your pumpkin. Use a little liquid glue to hold them in place. Freehand cut a face from black cardstock. Adhere it to your pumpkin with glue.

By freehand cutting the face, you'll get a different looking pumpkin every time.

And for added variation, use different patterned papers on other lollipops. Supplies: Heirloom paper - Splendor; Floral Frame paper - Splendor; Swirling paper - Flower Child; Groovy paper - Flower Child Happy haunting!
To make these spookalicious little guys, you are going to need:
- some lollipops
- a couple different sheets of patterned paper (from GCD Studios, of course!)
- cardstock
- string
- adhesive, scissors
Fold it again and again.
Unfold it. Set it aside. Wrap a piece of brown paper around the lollipop's stick. (Note: I used a piece of two-way tape to hold it down.)
Set the lollipop on your piece of patterned paper.
Fold the paper up, crinkling it as you go. Make sure it fully covers the lollipop.
Tie a piece of jute or string around the crumbled paper panel. Be sure to finish it with a pretty bow.
Set it aside and cut two leaves from green patterned paper. These don't have to be pretty. Just imagine you are cutting a rain drop. Once you've cut two of them, snip a triangle out of one end.
Place the leaves on your pumpkin. Use a little liquid glue to hold them in place. Freehand cut a face from black cardstock. Adhere it to your pumpkin with glue.
By freehand cutting the face, you'll get a different looking pumpkin every time.
And for added variation, use different patterned papers on other lollipops. Supplies: Heirloom paper - Splendor; Floral Frame paper - Splendor; Swirling paper - Flower Child; Groovy paper - Flower Child Happy haunting!
10.06.2012
Teachers Need Treats Too!
Good morning girls...Guiseppa here to share with you a fun project I made to give to those dedicated teachers. Halloween is a fun time and we often think about giving our friends yummy treats during this holiday, but what about our teacher? Ya...teachers need treats too and this is a super fun way to give it to them.
Add a cute tag to your treat box!
Now...this isn't any old treat box. Look how this works!
I think any teacher would appreciate this. It is perfect for a Halloween treat as well as any other holiday...just dress it up accordingly. Thanks for stopping by today and have a Happy Halloween!
GCD Studios Supplies:
Splendor- Heirloom #1678 and Oh Happy Day- Chloe #1766
Subscribe to:
Posts (Atom)