6.13.2013

A Cute Little Box For Him

Hello everyone! Dad's day is just 3 days away! Is your gift ready yet? If you have a Dad who buys about everything himself, a gift card may be a good idea for him on this Father's Day! We can put our special love and care in the gift card packaging, right?

Supplies: All from Special Delivery Collection. Heidi Paper #2041; Calvin's Race Paper #2039; George Paper #2037; Jack Paper #2043; Sincerely Yours Paper #2044; "I love you" & "No. 1" sticker from Label Stickers #2052; "dad" spelled using Alpha Stickers #2051.

I modified a box pattern I had on my blog earlier and made a new Collar Top Gift Holder Pattern that you can download at the end of this post. 


Download: 
Please note that you will need to print at 100% scale to get a box that will be big enough for a gift card. For my printer, I had to choose "Borderless Letter Size" in settings to make it print out the full image. 

The bowtie is made following Paper Bow Tutorial by Heidi Van Larr.
Thank you for stopping by! Happy Crafting!


6.12.2013

For the Boss of Sauce

I don't know about you, but I have the hardest time finding a Father's Day gift that my husband will like.  Socks and ties, while useful, are trite, and anything else he really wants often costs hundreds of dollars.  Fortunately, past experience has revealed that I can never go wrong with gifts of food, so I decided to make a BBQ sauce gift pack.


I die cut the BBQ sauce carrier using THIS die from Silhouette.  I increased the size of the file to accommodate the slightly larger BBQ sauce bottles.  The carrier was super easy to assemble and the BBQ sauce inexpensive making this a fun and easy gift for dad, grandpa, hubby, uncle brother, etc.


Admittedly, the carrier is probably not functional since the BBQ sauce is so heavy, but it still makes for a nice presentation.


I wrapped each bottle with a piece of patterned paper for a more coordinated look.  However, they are easily removable so dad can see exactly what he is working with.


The circle letters on Spencer are 1/2" across making them a perfect fit for your 1/2" circle punch.  I used the little letters along with the Alpha Stickers to complete the label.  

Have a happy Father's Day celebrating with those you love! 

Supplies: From Special Delivery: Dillon 2040, Calvin's Race 2039, Guido 2042, Jack 2043, Spencer 2046, Alpha Stickers 2051; milk carton die (Silhouette)

6.11.2013

A sweet little card

Hi GCD Studios Fans!  Christine visiting with you today and sharing a card that features some of the softer colors of Special Delivery.  We all know this line rocks the bold primary colors that scream boy, but it also touches on a softer feminine side too with the greens, light blues, and yellows.


I never would have predicted this card would have come out of this line had I not created it with my own two hands.  I love a line that is so versatile!


The flowers that I used are fussy cut from some of the patterned paper and add just the right delicate touch.


Thanks for coming by today!

Supplies: 
Special Delivery 6 X 6 Paper Pad #2050
Chipboard Alphas #2090
Adhesive Pearls #1887
Die Cut Borders #2055

6.10.2013

The June PaperCut Issue


Hello my scrappy friend!
What is my favorite day of the month? Well... it's the day the PaperCut issue comes out!
I can't believe we have been doing the PaperCut for one full year, because it's been so much fun putting it together. This month's issue is really special to me and no it's not because I'm on the cover haha. It's because I got to see the girls work with Special Delivery! This month we are celebrating the Special Delivery collection and the team once again has out done themselves! All the projects are so pretty and being that this collection is the feature of the month, GCD was so sweet and decided to do a spot light on me. Over on page 12, you can read all about "what's next for me" and about my $2 classes, which can also be viewed HERE

This issue is also packed with great ideas for Father's Day and we just know you will love it.

 photo GCDStudiosThePaperCut613CoverLarge_zps3d4c1aff.jpg

Thanks so much for all your support over the year and reading our magazine.
~H

10 Pictures on One Layout

10 pictures on a layout...a ONE page layout?  YOU BET!  Katrina here and I am sharing a layout using the GCD Studios Special Delivery collection.  

I am going to admit that this Top Ten list is currently what my top tens are.  I just could not narrow down what my top ten favorite things of all time are.  I like to spread my favorites around!  And notice, my pictures are not in order!

K_HuntTopTenList600

It is super easy to print on your pattern paper.  I measure my area on my layout where I want my journaling/message/list to go.  I type up what I want in Word, making sure to stay well within my area measurements.  I print it out on regular printer paper first.  I then cut my pattern paper the exact size that I had measured out.  Using bright light, center and attach your pattern paper over the top of your paper that you ran your test print on.  I just use a strip of removable adhesive at the top and bottom of my pattern paper.  Run back thru your printer and there you go!

K_HuntTopTenListLIST600

I used a cut file from the Silhouette store for a mini envelope to add my pictures to.  My pictures are sized around 2.25 inches square.  And I cut those numbers from the paper to number my pictures.
K_HuntTopTenListPics600

I love this little flower brad.  I tucked some twine underneath just for fun.
K_HuntTopTenListBrad600

Thanks for stopping by the GCD blog today.  Scrap your current favorites and then see how they change.  That is what I am planning on doing!

Supplies: Special Delivery Collection: Paper-*2039, *2040, *2041, *2042, *2043, *2044, *2045, *2046; Brads-*2053

Other Supplies: Cardstock, Silhouette Cameo with cutting files, Twine, Adhesive, Font (Honey Script)

6.07.2013

A Cute Girlie Layout

Suzanna here to share with you a layout about my daughter using Heidi's Special Delivery collection. One of the many fantastic things about this collection is the diversity of colors and embellishments. It can go either way; boy or girl. I am going to go girlie today!


This picture is HER. So incredibly her! That, "I know you want to take my picture so I'm not going to cooperate" look... The crossed arms of defiance yet playful fun... Gotta love her!


I went to town layering for lots of fun texture and visual interest. Cutting up the journaling bits, layering them with label stickers and borders. Add a brad or two for the dimension and you have even more sass and fun!

Supplies used - GCD: Patterned Paper: George, Jack, Heidi, Zack, Calvin's Race; Brads, Borders, Cardstock Alpha Stickers, Cardstock Label Stickers; Other: Cardstock: Coredinations; Pen: Glaze; Embossing Folder: Stampin' Up; Stamp: Heidi Swapp

Thanks for stopping by!

6.06.2013

He Said/She Said

 My husband and I have always had the funniest conversations. Conversations, however, no matter how funny they are, can be easily forgotten. I wanted to find a way to incorporate some of our conversations into a layout. A "he said, she said" theme seemed perfect. I diecut a boy and girl silhouette, and backed each of the silhouettes with pattern paper and a scallop die cut to give the appearence of a Cameo. I just love how perfectly the "typed" patterned paper worked for this layout!
The page is interactive. Under each grid with the silhouette is a little pull out tab. Each pull out tab has a few of our conversations.

Supplies:  GCD Studos: Paper - Special Delivery Collection, Silhouette Cameo

Thanks for taking a peek at my project! photo 2013-DT-Badge-Christina-Collins_zpsac819b58.jpg

6.05.2013

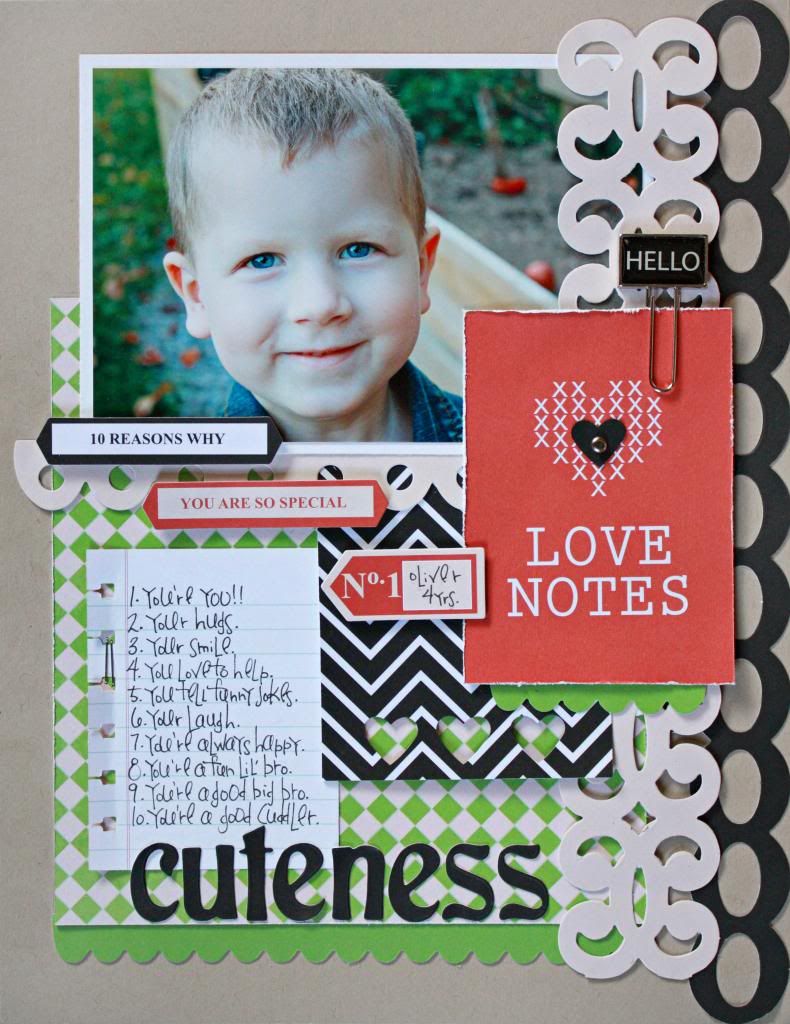
Love Notes


Hi! It's Kelly here to share with you a layout using Heidi Sonboul's Special Delivery.  I just love all of the possibilities with this collection...it really is great for every member of the family.

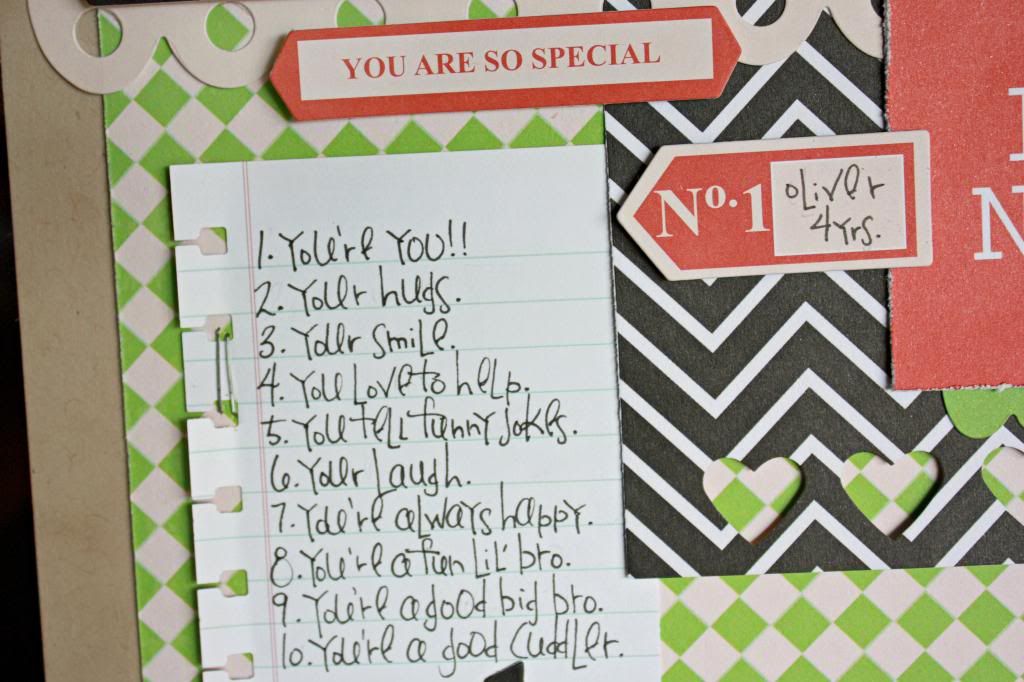
Hello Cuteness:


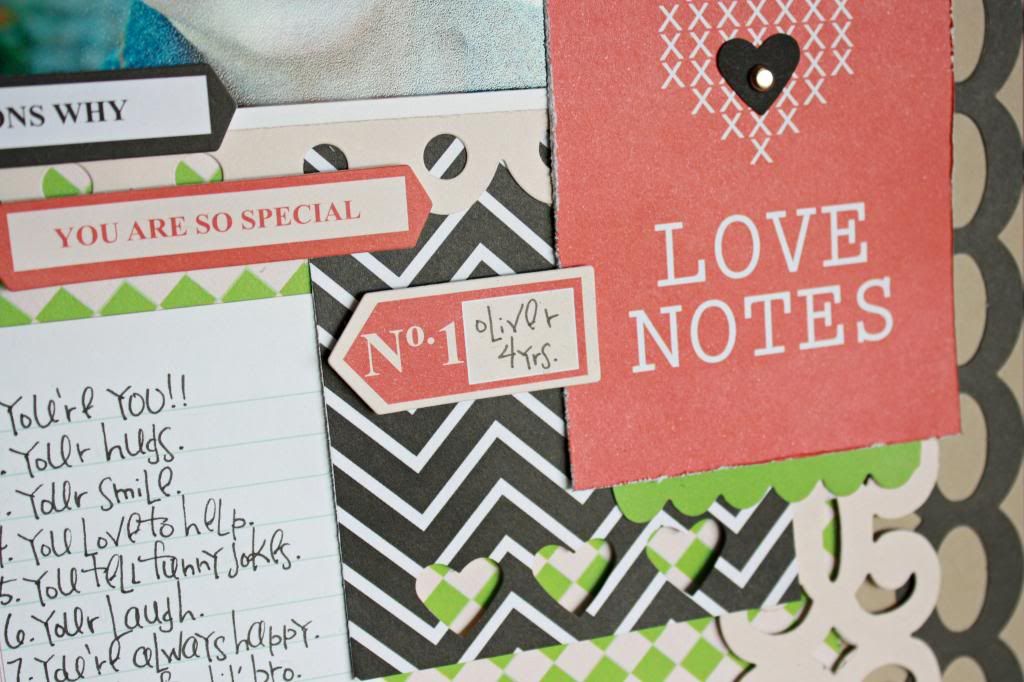
For this layout, I focused on using up some of the die cut border strips.  Of course these strips are great as borders...but they are also handy for layering, drawing the eye, and underlining titles or journaling.


I used 4 different borders for this project...here I used one to ground the photo, and a couple of label stickers.


I used a tiny bit of a green border to help make this flashcard stand out a little better...and used the rest of it under the title.


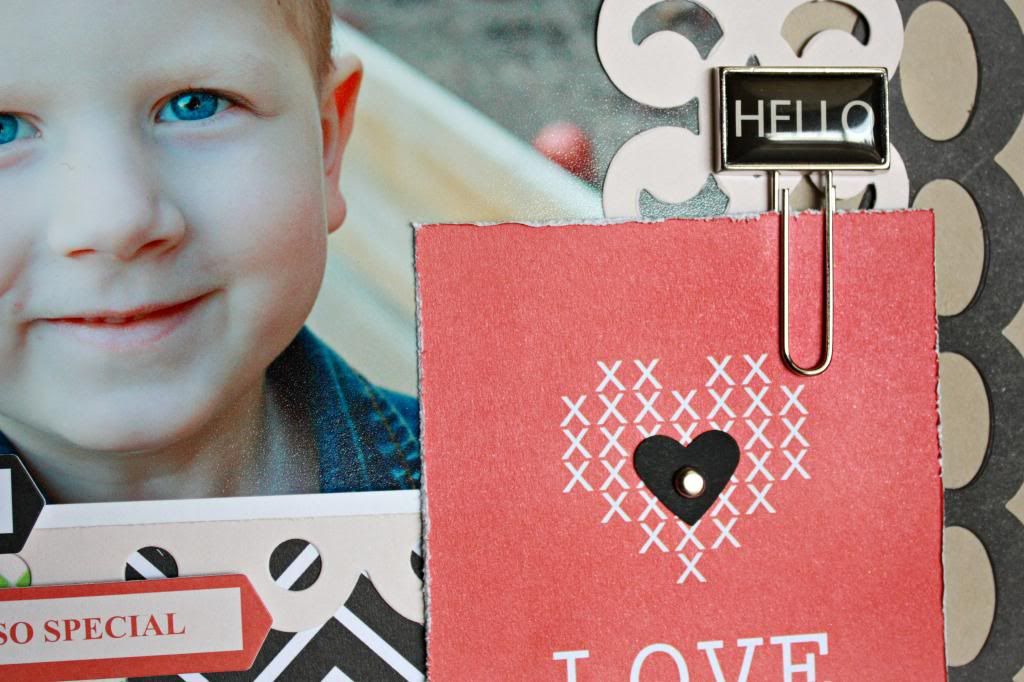
That neutral, intricately cut border was perfect behind this paperclip...really makes it pop!


I hope I've given you some good ideas for those super cute die cut borders.....don't be afraid to use 'em up!


GCD Studios Products Used:
Special Delivery 12x12 paper - Jack #2043
Special Delivery 12x12 paper - Calvin's Race #2039
Special Delivery - Die Cut Borders #2055
Special Delivery - Alpha Stickers #2051
Special Delivery - Label Stickers #2052
Special Delivery - Paperclips #2054


6.04.2013

HAPPY 4th of JULY & A Giveaway!

Hi GCD Studios fans!  Happy 4th of July to all the fans in the United States!  Christine here today with you to share a patriotic card!
 I love to create cards in a freestyle collage style and pile on all kinds of goodies in layers and layers!  For this one I started with my base layer adding patterned paper and faux stitching.  Then came some stickers.  Lastly I piled on some dimensional pieces including chipboard stars, a brad, and ribbon.


Supplies Used:
Patterned Paper: Special Delivery Dillon #2040
Stickers: Special Delivery Labels #2052, Letter Stickers #2051
Brad: Special Delivery

Christine Meyer Badge photo 2013-DT-Badge-Christine-Meyer_zpsfdd5245c.jpg

NOW LEAVE A COMMENT and we will pick 2 winners for the Special Deliver collection GIVEAWAY! Happy 4th of July everyone!!! Have a safe one!

 photo SpecialDeliveryHeidiSonboulCollection_zpsec1bb8fc.jpg

Hello Tags.


Tags, tags and more tags!!!  I have been loving tags on layouts recently and couldn’t wait to make a layout focusing on tags.


For this layout, I created my own tags from the Special Delivery collection.  For that, I used Jack (#2043) and Zach (#2048) papers.  The little cards were prefect for tags.  I use a pre-made tag for my template and then traced and cut the cards into tags.  I punched 5/8 circles from black cardstock and adhered them to the tag.  Lastly, I punched a hole through each tag and added twine. 

Here are some close ups:


Product:
GCD Studio’s Special Delivery papers: George (#2037), Dillon (#2040), Guido (#2042),  Jack (#2043), Zach (#2048) and Spencer (#2046);  Paperclips (#2054);  Brads (#2053); Alpha Stickers (#2051) and Label stickers (#2052).  Other: cardstock and twine.


6.03.2013

Do you Fussy Cut?

Hi everyone!  Julie with you here today sharing a layout I made about my Dad, using the Special Delivery collection! I love to fussy cut on my layouts! Fussy cutting from your papers is a great way to create your own embellishments!


Then to add in some texture, I sewed around in a circle on my layout with blue thread. The bright and vibrant colors go so well with this vintage photo...don't you agree?!


Add in a little hand journaling and my layout is complete. 


Thanks for stopping by!
Julie Tucker-Wolek Badge photo 2013-DT-Badge-Julie-Tucker-Wolek_zps630a9cba.jpg

5.30.2013

The Pure Bliss Collection


Hi! It's Kelly here to share a layout using the Pure Bliss Collection by Heather Tozzi.  This collection is full of soft pastel colors...perfect for documenting those baby photos.


One of my favorite things to do on my pages is layering.  So, I picked out all of the elements I wanted to incorporate onto my page, and played around with them until I was satisfied about how they looked.


I then traced around everything lightly with a pencil, and took everything back off. Layer by layer I began to stick things down...trimming, matting, or distressing as I went.


To finish up the look...I topped it off with the title, a sticker, a brad, and scribbled in some journaling.


Thanks for stopping by!

Supply List:
Pure Bliss 12 x 12 paper: Blooming #2027
Pure Bliss 12 x 12 paper: Crossword #2021
Pure Bliss 12 x 12 paper: Diamonds #2029
Pure Bliss 12 x 12 paper: Journal Tags #2025
Pure Bliss 12" Die Cut Borders #2036
Pure Bliss Cardstock Label Stickers #2033
Pure Bliss Brads #2034
Fun & Funcky Alphabet Chipboard Letters #2106

Kelly Holbrook Badge photo 2013-DT-Badge-Kelly-Holbrook_zps7dc269eb.jpg

5.29.2013

Welcome, Little One

I always say "babies are a blessing" and I mean every word. Making baby cards is the most fun because usually the design, from the papers to the colors, have a very specific requirement: they have to be CUTE!
Today I made a baby boy card using papers from the Pure Bliss Collection. The versatility of this paper pack is just amazing. Depending on what combination of the papers you use, your card can be used to make a wide range of themed cards.
I used a tag sticker from the collection as the starting point for my boy themed card. Paired with the blue patterned paper, which I distressed a bit,  and I was half way there to having a boy themed beauty!  To complete the masculine feel, I added a burlap base. A matching kraft colored banner conveys a simple sentiment to usher in a new bundle of joy.
I love the look of layers on a handmade card, something the store bought cards can never compete with! Supplies: GCD patterned paper: Dizzy Heart (2022), Label Stickers (2033) Other: burlap remnant, Papertrey Ink banner die, stamp Nursery Necessities by Stampin' Up, twine Lawn Fawn Wida Miller Badge photo 2013-DT-Badge-Wida-Miller_zps32a1aa68.jpg