12.22.2011

simple little decor project

Merry almost Christmas to everyone! Today I thought I would show you how to make a fun and simple little decor project for your home this Holiday season.

I had the idea in my head to do a little framed stocking. For my template, I simply did an online search and got this:

You can get the full size image by clicking here. I printed it out on regular paper, and trimmed around the edge. I used this to cut a stocking out of white cardstock, then covered it with Christmas themed paper from the Rob & Bob Scandia Jul collection.


I stitched around the edges for some added texture, and to make it look a little like fabric ;)


I added some letter stickers and punched embellishments, as well as some white felt for the top of the stocking.


This project only took me about an hour from start to finish! A quick little craft. You could even do different patterns - a candy cane, gingerbread man, Christmas tree, snowflake....there are lots of possibilities!

Hope you have a blessed Holiday season!
Photobucket

12.13.2011

Red and Mint Green with Tessa

Red and mint green have been a favorite holiday palette of mine for a long time. Paired with the black and gold of this inspiration photo, these colors are a beautiful take on traditional Christmas hues.


I decided to make a necklace, something I might wear to a holiday party this year. I combined fabric flowers that I made myself with a pendant made with the Chip Art tool and a bird cabochon from the Sweet Surrender collection:


I stamped my initial and three doves (for my three boys) into the chipboard disc that came with the necklace. To match the color palette, I spray painted both the chipboard and the setting gold.


I love how the bird cabochon looks like it's landing in a nest of red satin and beads.


I have already added Chip Art inspired jewelry to my Christmas gift list and can't wait to experiment with more materials. The possibilities are endless and the Chip Art tools are so easy to use. Whether you combine them with the color palette that inspired me or go in your own direction, your creation will be well-received. Thanks for stopping by today!

12.11.2011

I love advent calendars

I loved advent calendars when I was a little girl. To be honest, I still love them as an adult. Every year I purchase an chocolate advent calender for my girls but this year I wanted to make one. I found a little box template online and then proceeded to created 24 of these cute little packages of happiness.


They take a little time to make but they are so worth it. Just find a box template you like and then go to town. You can even enlist your little helpers to punch out the circles and adhere them to the boxes. I add a few pieces of candy to each box and then place the boxes in order on my mantel piece.


Supplies:
Under the Big Top from Funhouse
Sweet Spot from Material Girl
Butterfly Harmony from Spring in Bloom

I hope that this will inspire you to create your own version of an advent calendar. Even though it's the 11th... you're not too late. So, just get out those papers and get crafty!

12.10.2011


Last year was no exception with our snowy filled days and not only do I love it, but Alyssa does too! She couldn't wait to dawn on her winter gear and go play in the snow! Here I created a layout that has her putting all her winter clothing on and running outside. Little did she know that it was FREEZING out there! I snapped her turning around looking at me! She kept saying it was "snow" cold out!


GCD supplies: Rob&Bob Scandia Jul Scandinavian Holiday Stripe Collection papers, Rob&Bob Scandia Jul Scandinavian Sparkle Lattice Light Green papers, Rob&Bob Scandia Jul Scandinavian die cut ornament sheets, Tina Higgins Flower Brads Sweet Surrender Collection.

So tell me friends, do you like frosty mornings too?
Photobucket

The Carney's
Dayv, Elizabeth, Alyssa, and puppies Jake, Kira, and Gracie
My blog
When I stand before God at the end of my life, I would hope that I would not have a single bit of talent left, and could say, "I used everything you gave me". Erma Bombeck

12.08.2011

Oh Joy it's Crafting time with Heidi Van Laar!

Hello! Want to see and amazing be of inspiration?

The colors in this are so amazing, and although not typical, I think they are perfect for Christmas! I have a couple of cards to share to show you what I mean.


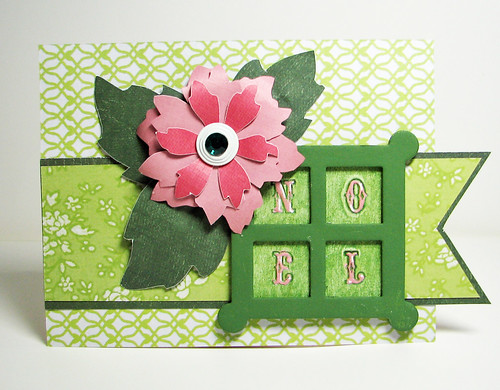
I broke out my Chip Art tool and some Soul Food papers to create this bright Noel card.

12-11 NOEL

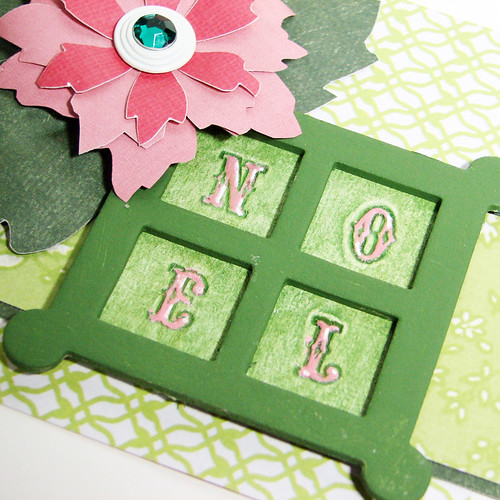
I hand cut the pink poinsettia from some solid colored b sides and added a jeweled brad from the Homespun Chic collection.

12-11 NOEL det

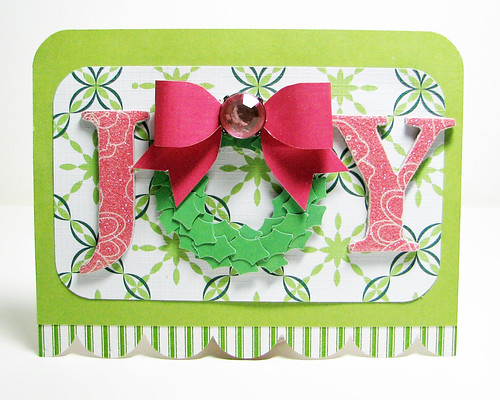
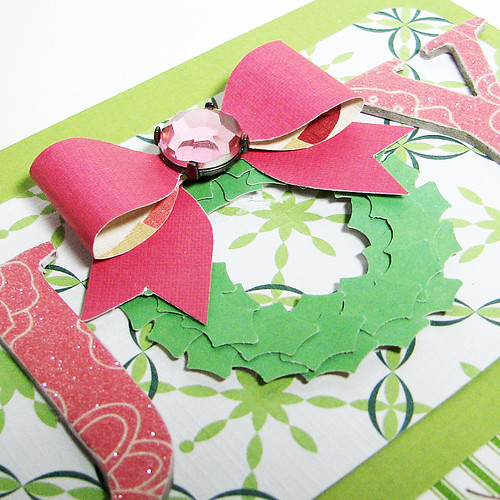
More solid colored B side papers from the Material Girl and Ava collections created the bow and wreath that are the focal pint of this card. And lets not forget that big beautiful Homespun Chic bling!

12-11 JOY

Material Girl and Scandia Jul proved the the paper that make up the multi- toned green background and I covered some Chip Art letters in Material Girl paper and added some glitter for holiday sparkle to finish my "JOY"

12-11 JOY det

Now if only I could convince my husband that pink is a Christmas color :)

12.06.2011

How are your holidays going?

Hello everyone! How are your holidays going? I've been gearing up for our big wrapping day by making holiday gift tags... enough to use on our family gifts and enough to share as gifts for teachers and neighbors.

This year my holiday gift wrapping inspiration has stemmed from this inspiration photo...


and here are my 2011 gift tags...


... and a mini tag box to keep of gift them in:)


Products: patterned paper (Soulful from Soul Food Collection, Our Family Tree from Sweet Surrender Collection, Light Green Sparkle Lattice from Scandia Jul Collection and Black Floral from Artsy Urban Collection).

What kind of crafty gift wrap are you whipping up this season?

Photobucket

12.05.2011

wrapping gifts

I will admit it - I am no good at wrapping gifts. My corners are not perfectly creased, I never seem to cut the right amount of wrapping paper before starting, and I tend to end up with tape sticking my fingers together. So what's a girl like me to do? Bag it. And just so that simple bag can stand up to all the pretty, perfect boxes under the tree, add an over the top gift topper.


Using scraps from the Scandia Jul collection, a few snowflake ornaments and a handful of picks from the holiday floral aisle, I whipped up these gift toppers each in a matter of minutes.


Using a striped patterned paper always makes for a great rosette. Jingle bells tied with twine are the perfect center embellishment.


A large berry pick is prettier with hand-cut, patterned paper leaves.


A large banner cut from patterned paper and laid over a smaller berry pick makes for a great "to and from" backdrop.


A thinner banner with cabochon accent is a fun addition to a feather, jingle bell pick. With fanciful gift toppers like these, I'm hoping no one notices my lack of present wrapping skills. Happy holidays!


Photobucket

12.03.2011

WOOT a double Teri post in one day! Surprise!

Hi everyone!

One of my favorite gifts to give during the holidays is gift cards.

That's because it is that one gift I don't have do any guessing for: Buy a gift card, give it to the recipient and let them decide! Translation: Happy Teri! :)

This year, I'll be giving my gift card gifts the handmade touch with a simple envelope made just for them.

They will look at a little something like this.


And like this.


These little envelopes are super easy to make and not the least bit difficult on your budget.

Here's what you need to make one of your own:

* GCD Studios patterned paper (I'm using paper from the Scandia Jul collection.)

* Small merchandise sacks (I'm using ones I found on Etsy.com.)

* A strong adhesive, paper trimmer and embellishments

Start by cutting sack down to 3" tall.


Cut a 3 1/2" x 4 1/2" piece of patterned paper.


Decorate with two additional strips of patterned paper.


Fold paper to fit around the bag. Add adhesive only on one portion of the paper. Adhere to bag.


Slide what you want inside the envelope.


Seal the envelope up by putting adhesive on the half of the paper.


Decorate envelope as you see fit.

I chose to decorate my envelopes with patterned paper, gems and a little twine. I think it would be fun to use letter stickers and diecuts as well.

Happy holidays!


terisplace.wordpress.com

Special Christmas Cards for Special People

Hi GCD fans!

Say it with me: The holidays rock!

I don't know about you, but every year I send out around 100 Christmas cards to family and friends. I've got a plan this year to make it easier on myself. Rather than sending out handmade cards to everyone on my list, the majority of them will receive a printed card. I will make a few extra special handmade ones for a few extra special people on my list.

I decided the other that there was no time like the present to get going on those extra special cards and set out to make a couple shaped cards the other day.

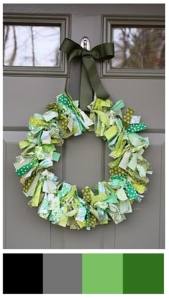
I started by finding a little color inspiration from this picture.


Pretty, huh?

I always fall into the red and green trap when it comes to cards so I thought this combo was perfect to try out for this project: Heavy on the green, no red and little bit of gray and black.

I used the photo as a springboard to make this tree card.


The papers are all from GCD Studios' Scandia Jul collection. I cut several papers from the collection into 1" x 3" strips, folded them in half and then mounted them on cardstock to shape a tree.


The stars are from GCD Studios' Chip Art Chipboard Shapes collection. I painted each of the stars with silver paint. I added gems to some of them. Others, I added buttons from the Sweet Surrender collection.

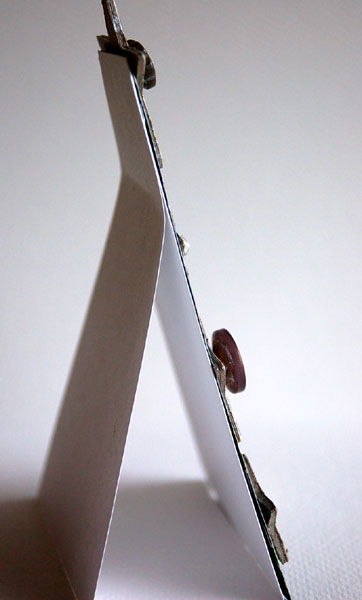
And in case you wondering, the tree really does stand on its own. :)


I used this first card as inspiration for myself to make a second tree card.


This time, I cut a triangle card base from cardstock and then ran strips of patterned paper down it. That made it a little less time consuming than the first card.

I decorated the card similar to the first one with chipboard painted stars, buttons and gems.

This card also stands on its own, thanks to a tent-folded design.


See you again soon!

terisplace.wordpress.com