5.31.2010

Goodbye May

May has come and now it's gone. Didn't it go so fast?
It brought spring and sunshine.

Did you grow a little this month?
What did you learn this month?
Was this a great month... or a bad month for you?

Share your thoughts about "May" and "what you learned". A friends knowledge is the best kind :)


Today, I have this amazingly beautiful layout, by a dear friend Christine Middlecamp. She amazes me with each new project she makes and we were lucky to have her play with our Lydia collection.

Enjoy


Photobucket

Photobucket

Photobucket

5.30.2010

Nested Dolls Inspire Nested Cards

This was a fun month of Nesting dolls and seeing how our DT gals used the inspiration.

Remember... to sign up for our news letter for the Month of June. There are more amazing ideas in the letter, that are not seen on the blog. Simple email me at
inthestudio@gcdstudios.com
~H

---------------------------------------------------------------------------------------------

Hi all!

Well, I'm at the end of the train this month for GCD Studios.

Heidi's been challenging the design team all month on the GCD Studios blog to make something inspired by these fun dolls.


My first thought was to make a cute nesting doll card. That seemed a little too obvious so I decided instead to make a nested cards. I'd somehow incorporate a smaller, blank card onto a larger card. That way, the recipient will receive a card from me, as well as a blank card that she can give to someone else.

I ended up making two nested cards.

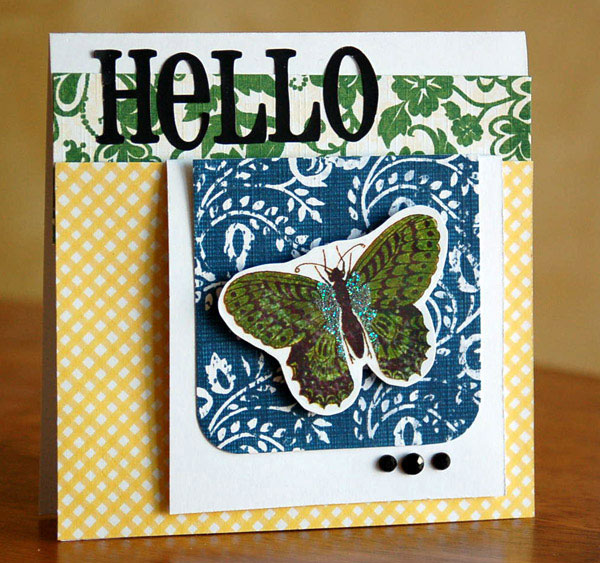
Here's my first attempt.


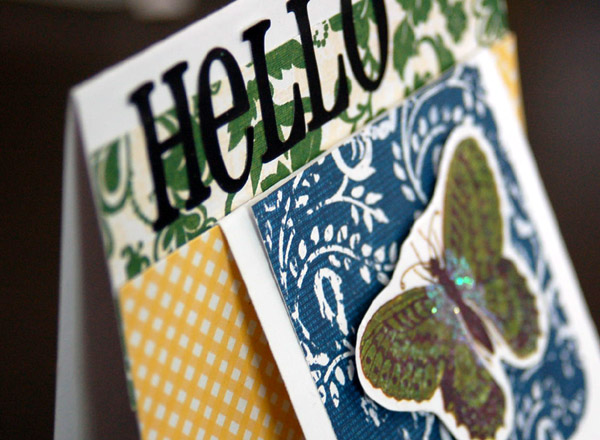
The small panel with the butterfly is the mini card. The yellow patterned paper from Melody Ross' Artsy Urban collection acts like a pocket. I only adhered adhesive on three sides of it so the little card could be slid out.


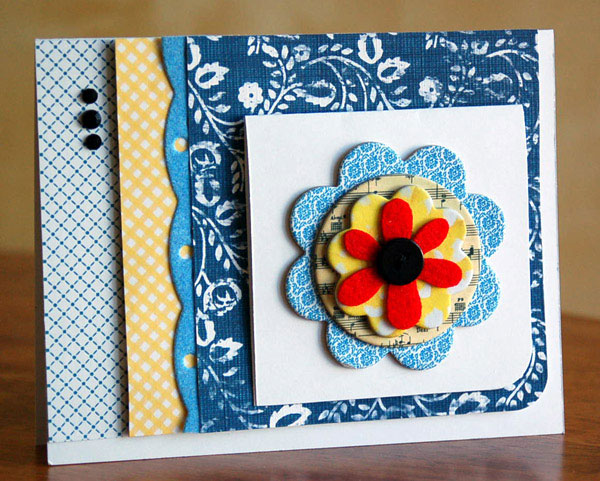
And here's my second attempt.


The flower panel here is the second card.

Rather than putting a sentiment inside the big card, I put a sentiment inside the mini card. It serves a dual purpose, working as a sentiment for the recipient of the little card as well as the big card.


With this one, I adhered the mini card with small piece of two-way tape. The recipient just has to pull the mini card off of the big card.

That's all for now.

Thanks for stopping by. I'll be back again soon.

-Teri Anderson
for GCD Studios

5.29.2010

Frosting the tops of cookies

This month's technique layout was to use lots of color! Reds, blues, greens, & yellow. The colors black & white were to be used to pull the layout together with minimal use. I matted the Kraft cardstock with black cardstock and painted a light covering of gesso over the Kraft. I also used white thread as a border around the Kraft cardstock using my sewing machine. I then took strips of paper by three different collections from GCD Studios and sewed strips of them down in the bottom half of the layout. I adhered my photo above the strips. My title went over the photo – keeping the same horizontal design of the strips of paper. The chipboard hearts were placed over the strips of paper bringing the bright, colorful pops of color to the layout. And lastly, I stamped two sentiments below the strips of paper.


To create the chipboard hearts, I used the Chip Art Tool. First, I painted four of the hearts in red, green, blue, & yellow with Ranger Dabbers. I let them dry completely and then covered the tops in a thick layer of molding paste – kind of like frosting the tops of cookies :-) I left a little border around the edges. This had to completely dry since I was going to be “stamping” the little heart images in the paste. It took a good hour to completely dry. Once it was dried, the molding paste was quite flexible and would easily hold the little heart images in it. I took the small heart stamp and using my mallet pounded the images into all four hearts. As you can see, the images appeared quite clearly! After stamping the heart images into all of the hearts, I then liberally sprayed each heart with a corresponding color of Glimmer Mist. It sunk into the areas that were stamped and once it was dry, it had a very pretty, shimmery sheen to it! I let those completely dry and then simply placed the on my layout! This is another great way to use the Chip Art Tool!


SUPPLIES USED:
1. GCD Studios:
Chipboard Hearts
Chip Art Tool, Mallet, Acrylic Block
Artsy Urban Patterned Paper
Homespun Chic Patterned Paper
Ava Collection Patterned Paper
2. Ranger Paint Dabbers
Clover
Watermelon
Pool
Sunshine Yellow
3. Molding Paste
4. Tattered Angels Glimmer Mist
5. Digital Vintage Photo Frame - Kitschy Digitals by Danielle Thompson
6. Kraft Cardstock
7. Bazzill Cardstock
8. Gesso
9. Stazon Ink - Black
10. Technique Tuesday Stamps
11. Label - Paper Source
12. Doodlebug Alphabet
13. Basic Grey Alphabet

Melissa Mann

-----------------------------------------------------------------------------------------

The winner of our Butterfly stitcher from Artsy Urban is....

Jen said...

Love butterflies & the Artsy Urban collection!!


5.28.2010

Paper is sold in 12 x 12 squares

Hi all! Mimi here! I wanted to share one of my favorite techniques for making a page unique. Take it off the page! Just because paper is sold in 12 x 12 squares does not mean every layout has to be square.


I added a black bracket edge to one side. I then cut the page down to 12 x12 again so it would fit into a page protector in my album. This is such a quick and easy way to add a bit of drama to a layout.


For this layout I used the Artsy Urban line. I just love these papers and brads...perfect for an outdoor layout like this.


For this card using the Homespun Chic collection, I let the hand cut flowers hang over the edge. It just gives the project a little more interest.

Thanks so much for stopping by!

5.27.2010

Friends and Flowers

Hello!
Juliana here with a tutorial on how to create your own wall hanging to use as a decorative piece for your own home or maybe even as a gift for someone special! All you have to do is take some fun patterned papers, mix in a little bit of black and white, some chipboard flowers, a few buttons, some lace and you have got yourself a fun little wall hanging! Yes indeed! So now let me walk you through the process.
Friends and Flowers Wall Hanging
by
Juliana Michaels

Directions:
Cut 29 - 2.5 x 4 inches pieces of patterned paper in various colors/patterns. (I choose 4 different patterns: 1 yellow, 1 red, and 2 blue. )
Use decorative edge scissors and border punches to create a fun edging on each strip.
Layer them and adhere them together with adhesive until you have a piece that is 15 inches in length.
Use your sewing machine to add a variety of stitching along the edges. (I used both black and white thread and both straight and zigzag stitching. )
Adhere the lace along the edge of this piece starting at one end and running it around to the other end. Leave enough at the top so that you can hang your piece. (The piece of lace I used was 40 inches in length.)
Attach the Artsy Urban Chipboard Flowers, Vintage Buttons and Homespun Chic Word Strips. Cut out several butterflies from the patterned paper (this butterfly pattern is in the 8x8 paper pack) and attach them.
To finish off the project you are going to create your own version of the Artsy Urban Chipboard Flowers. When I was creating this project it just didn't look finished to me with only the above decoration. That is when I came up with the idea to create a larger version of these flowers to add to the top.
Directions continued...
Take varying sizes of the Chip Art Chipboard Flowers and cover them with different patterns of paper.
Take a circle shape from the Chipboard Basic Shapes Small and cover it with pattern paper.
Hand cut your own leaves from patterned paper. Glue your shape onto scrap chipboard and cut out your leaves.
Use sand paper or a sanding block to smooth the edges.
Adhere the pieces together.
Finish by adding an Artsy Urban Crochet Flower and Vintage Button to the center.
Adhere your completed flower
to the top of the lace.
Attach a hook to the back side of the large flower and hang the finished piece on your wall.

Supplies:
GCD Studios
Patterned Paper: Artsy Urban/Big Butterfly, Book Page, Butterfly, Blue Floral, Petit Floral, Postcard 1, Red Floral and the 8x8 Specialty Paper Pad
Embellishments: Artsy Urban/ Crochet Flowers, Vintage Buttons, Layered Chipboard Flowers, Inspiration Cards; Homespun Chic/ Word Strips
Chipboard Shapes: ChipArt Flowers and Basic Shapes Small

Other:
Decorative Edge Scissors by Fiskars; Border Punches by Fiskars; EK Success and Martha Stewart; Lace unknown; Adhesive by Helmar; Sewing Machine.

Thanks for stopping by today!
Happy Hugs!
Juliana

5.26.2010

Mini Cabinet

WOOT it's Wednesday!

Todays winner is.... {connie}

Contact me at hsonboul@gcdstudios.com and please RWW #3 in the subject line

---------------------------------------------------------------------------------------
Today I have this beautiful card created by our Guest designer Jen.

She took a few strips of pattern paper and ruffed them up. Then by layering them, you have a fun and simple design. Thanks Jen!

-----------------------------------------------------------------------------------------
Hi there! Kristen here with a new inspiration decor item.

Our theme this month are these little nesting dolls, with lots of color and different bits, it inspired me to create a decor item for my scrap room.


I wanted to create something meaningful to me, and so I created this darling sectional mini cabinet.

It's all about creating art, with phrases and beautiful colors and glitter and fun items.
To create this cabinet you will need

GCD Studios

Homespun Chic Collection- Applique, Homespun Garden, Homespun Mod, Vintage Audrey, Vintage Birdy, Vintage Jane, Pink Sparkle papers, Epoxy stickers, Felt Flowers, Vintage Buttons, Die Cut Borders, Textile Tags, Word Strips, Chipboard Ladies, Vintage Labels, Textile tags

Ava Collection- Flutter paper

Chipboard tools- Sparrow Alpha Letters, chipboard tags, and Butterflies stamps

other- pink rickrack, gems, twine, black mist, silver metallic rubons, buttons, butterfly punch

First, I measured and cut each inside rectangle shape with a different paper. I made the Create tag by first debossing the tag with the butterfly stamp and letters for Create, then spraying the tag with a black misting spray. When the tag was dry, I lightly rubbed the front with silver metallic cream rubons.


I decorated the inside of each part differently with tags, stickers, fabric tags, chipboards, punches, buttons, and epoxys.

Once the insides of the boxes are done, start decorating the edges of the frame. I added the chipboard lady, and the chipboard word strips.


I then added the border strips, adding foam tape between each layer. I handcut three clouds, adding them to the top right corner. And punched several butterflies, adding gems to their centers.


I also cut several small triangles with various papers, punching tiny holes in the corners. I threaded them onto a strand of twine, knotting the ends and using glue dots to hold them in place.

For the bottom of the piece, I added two border strips, fussy cutting out three roses from another border strip, and hand cutting several leaves from green gingham paper. I finished the bottom with pink rickrack.
I hope you have enjoyed my themed project today!

kris

5.25.2010

Maximize the white space on my layout

I often times find myself using color to help define the mood and style of my cards. For example, if I want my card to have a clean and graphic look to it, I will maximize the white space on my layout. In card design, an easy way to do this is to start with a white card base and add a few graphic elements to it.
To create card:
1) make card from cardstock and round bottom corners with corner rounder
2) fussy cut medallions from patterned paper and adhere to card
3) apply gemstones
4) stamp sentiment
Patterned paper (Ava collection); gems (K&Co.); stamp (Unity); other (white cardstock and black ink)
Easy... right? This one was so easy that I made a few more for my next card swap;)
Here is another example using the same patterned paper and bright colored gems... but with the addition of more black into the design, this card has more of a dramatic feel and leans more toward an elegant style.
Patterned paper (Ava collection); brad (Homespun Chic collection); gems (K&Co.); black organza & satin ribbon (Michael's Crafts Inc); other (black & white cardstock)
To create card:
1) make card from cardstock
2) layer patterned paper on black cardstock and tie on ribbon
3) apply gem stones
4) adhere to card How does color influence your work?

5.24.2010

I love the look of small shapes of patterned papers

I am super excited to share another GCD Studios project with you!! This month, Heidi challenged us to use these adorable doll images, full of a variety of patterns & colors to inspire us . . .
Photobucket
I love the look of small shapes of patterned papers used to create an overall quilted image & was drawn to this mix of blues & yellows from the Homespun Chic, Artsy Urban, and Ava collection. A little machine-stitching helped to add to that "quilted" feel :)
Photobucket
I am totally addicted to the Homespun Chic word strips - just the perfect sentiments for the journaling I wanted to incorporate into this layout!! The GCD Studios paper also is awesome for doing a little "fussy cutting" - there was a sheet in the Artsy Urban collection full of butterflies - just the right touch for under these word strips :)
Photobucket
I incorporated a few of the borders from the Homespun Chic & Artsy Urban collections as well - I am a BIG border fan and love that these can be bought pre-made :) I decided to "cap" off the end of this strip with one of the GORGEOUS Homespun Chic buttons - the white rose button was just the right feel for this wedding page :)
Photobucket
I loved this month's theme of mixing a variety of patterns & colors - hope you find time to try it yourself :)
- Julie