Hey there Elizabeth here! I wanted to show you an easy way to create circles on your pages!
We all like shapes don't we and this month GCD Studios is rockin' the circle shapes. I especially love creating circles myself and try to use them as much as I possibly can.
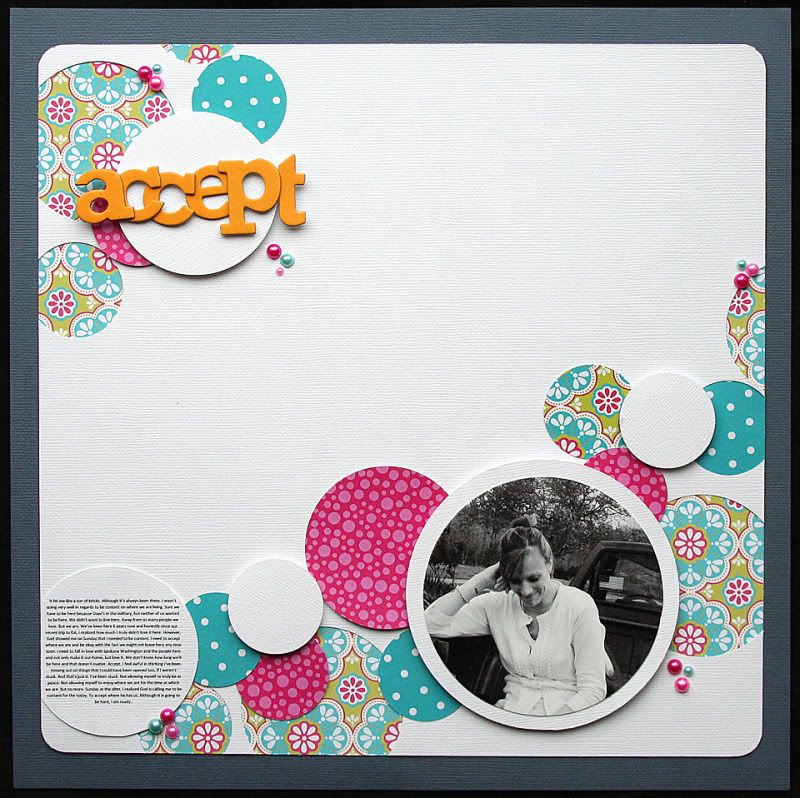
Here's what I created:
Supplies: Flower Child Twisted Floral papers, Sweet Tooth #1558 Peppermint Plaid papers, American Crafts cardstock, CM corner rounder, American Crafts Thickers, Doodlebug Pearls, Computer font Century Gothic.
For this layout, I went back to the basics. I used my Coluzzle Circle Template along with my Marvy circle punches. I used both the cutter and punches and just cut straight into the cardstock wherever I wanted a circle. I didn't have any kind of pattern going, I just cut and punched! This way a design was formed and I wasn't even trying! I also punched out circles and added those to the page later. When the cardstock was cut, I took another sheet of pattern paper from GCD Flower Child and added that to the backside of the cardstock. I just adhered the two together then added all of the other circles I created. Once those were adhered, I cut my photo with my Coluzzle as well and placed on the page. I also did this for the journaling too. The effect of each circle is amazing! Some look popped up, and others look as if they are inlet to the paper. I thought this created a neat effect for my page!


What a great page - I love the colors and the way you used circles. Thanks for sharing.
ReplyDeletethis is BEAUTIFUL!
ReplyDeleteI love how this pops...gorgeous!
ReplyDelete